
Project Description
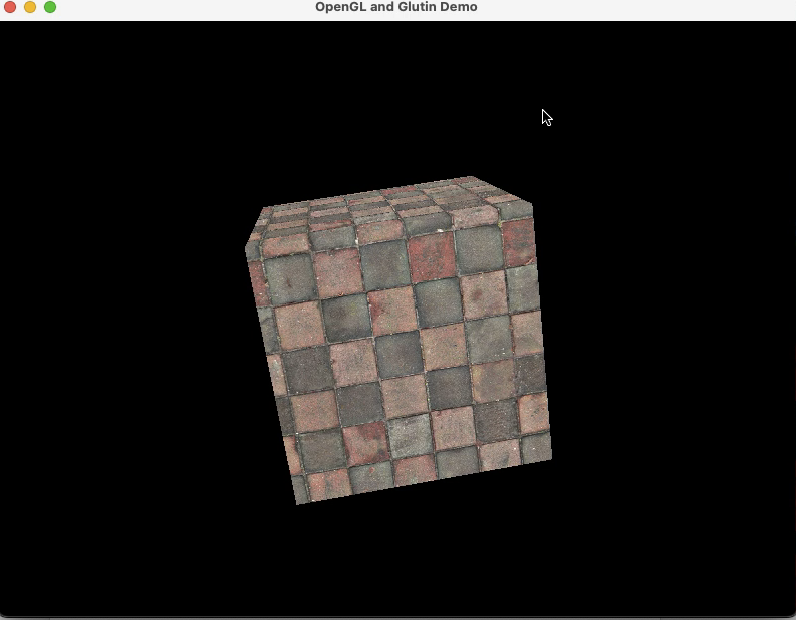
RustWorld is my most ambitious project to-date, and delves into the topics of rendering techniques and procedural generation. This program is capable of producing a new world model at runtime based on a random seed and layered Perlin noise. The graphics rendering pipeline in RustWorld is built directly on the OpenGL API without any reliance on wrappers or third-party libraries, and I wrote my own fragment and vertex shaders in GLSL to have control over the appearance of each cube. In my process described below, you'll see me progress from rendering a simple triangle to the scene shown above.
Project Process
This was my term project for "Emerging Technologies", a self-directed senior course aimed at researching and developing skills in modern programming fields. I am a dedicated lover of C++ and wanted to learn a new
low-level language, and Rust is booming in popularity right now, so I decided early on that I wanted to do whatever project I chose in Rust. After more thought, I landed on a Minecraft-style terrain generator, and I wanted to
create the graphics as "from-scratch" as possible.
Below, I briefly cover the steps I took to achieve this program.
For more information I encourage you to go and look at the source code.
Picking a rendering API
A rendering API is a set of tools that enable communication with a computer's graphics hardware. Two commonly considered options for a project are OpenGL and Vulkan. After some research, I opted for OpenGL. OpenGL is generally considered more beginner-friendly compared to Vulkan, which is acknowledged to be better suited for extremely demanding applications (which mine is not).
Creating a Window
OpenGL requires a window to draw in. My next research task was to choose a library that provided that functionality, as well as handling user input. I landed on Glutin, a Rust library that provides a cross-platform toolkit for OpenGL contexts.
Learning the Basics
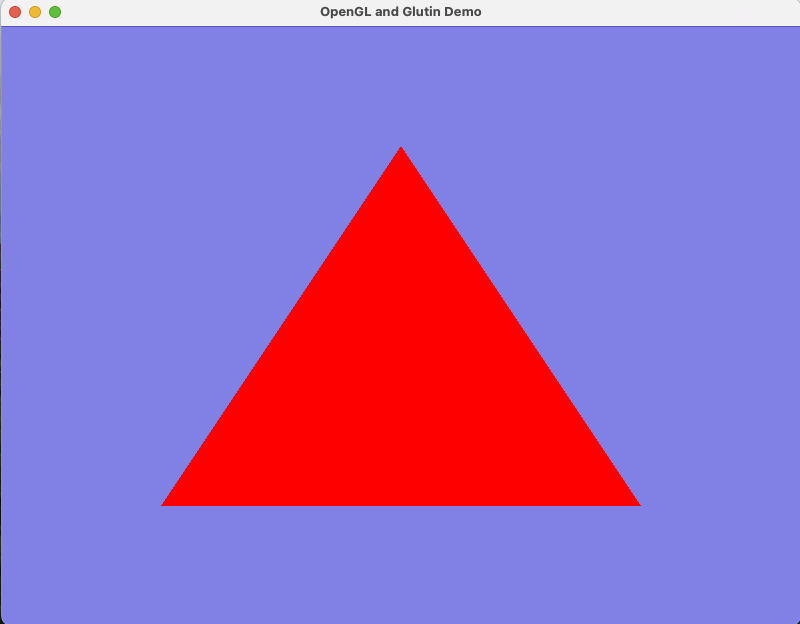
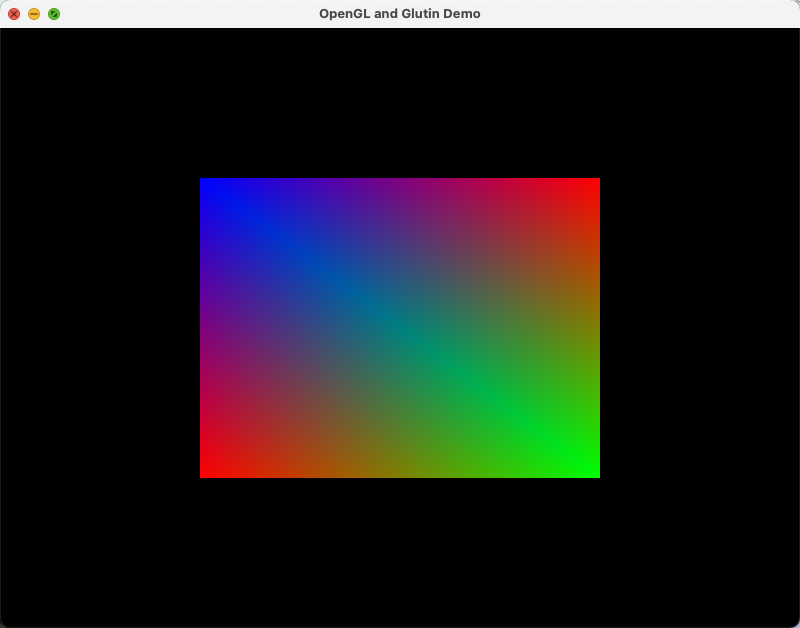
Now I was finally ready to start drawing something! I started following some tutorials that led me through the process of drawing my first triangle, writing my first vertex and fragment shaders, loading textures, and applying transformations to a shape.
Creating a "World"
Cube(3)
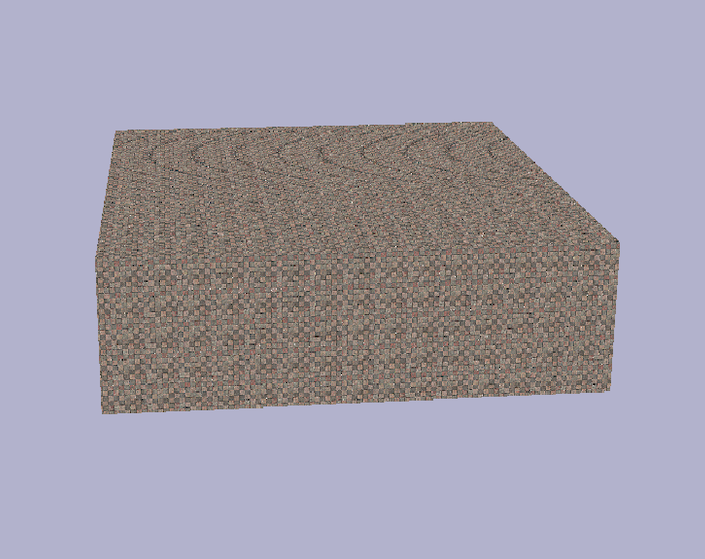
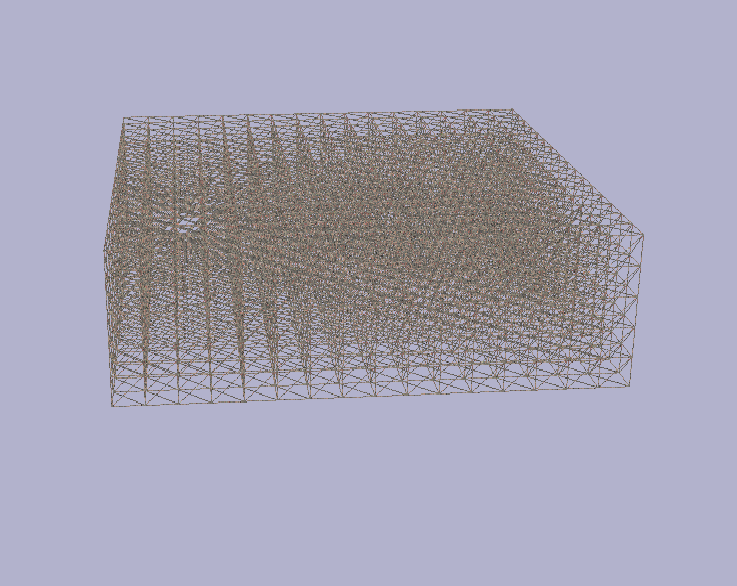
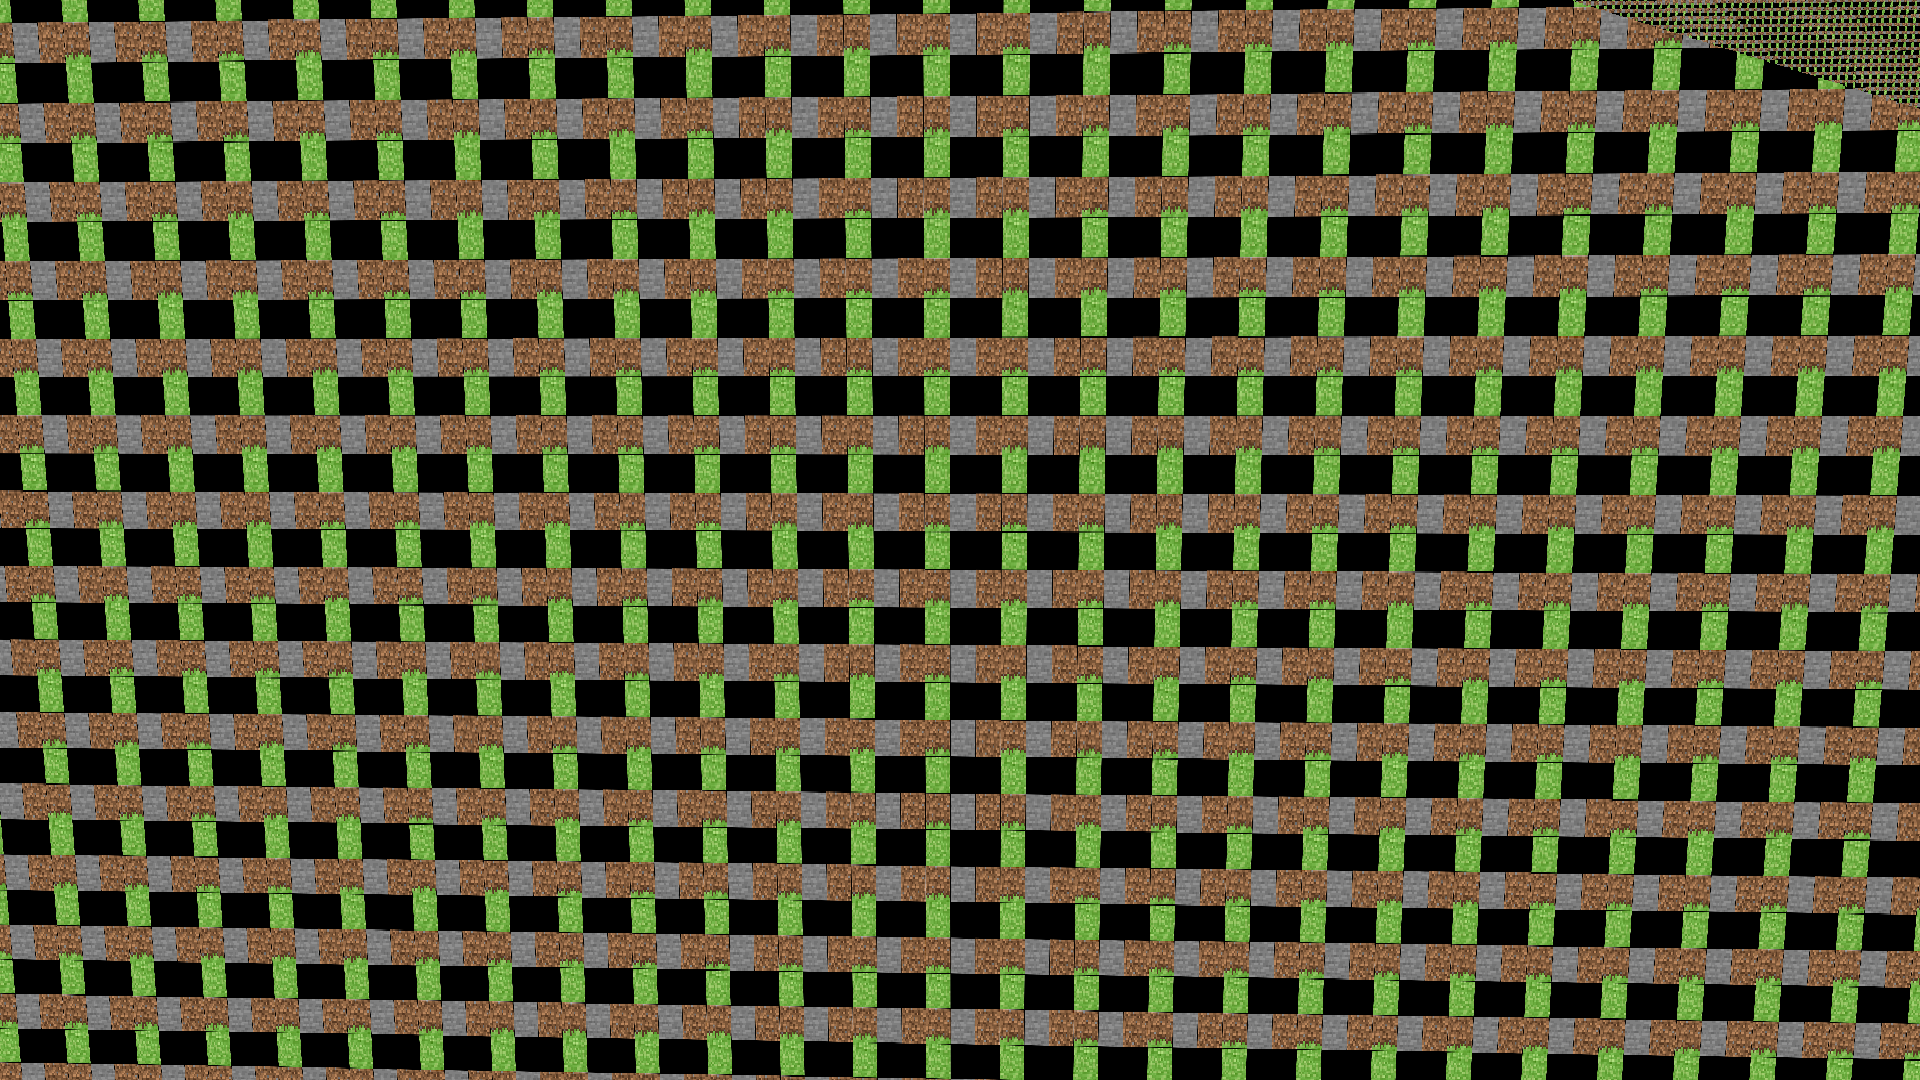
As you can see above, I was now able to render one cube. But, my project requires so many more cubes. My initial attempts were pretty ham-fisted. Here you can see my very first success with rendering a solid chunk of cubes. Here, I was explicitly defining each cube's position, defining a vertex buffer for every single cube, and rendering each cube's face. You can probably imagine that this was extremely inefficient. From the wireframe (second photo), you can see that a ridiculous amount of faces are being rendered that won't ever see the light of day.
My quick solution to this issue was to only render cubes that don't have neighbors on all 6 sides. "Inside" faces of each cube were still rendering needlessly, but with the time constraint
of the semester I had to make a call here to either spend a lot of time getting this one thing perfect, or get multiple elements going first and then come back and fix the little flaws- I chose the latter.
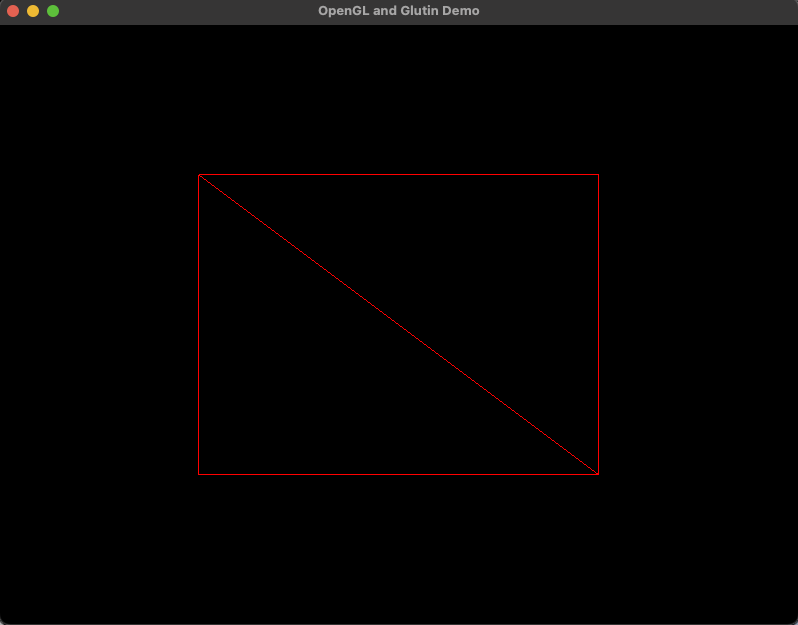
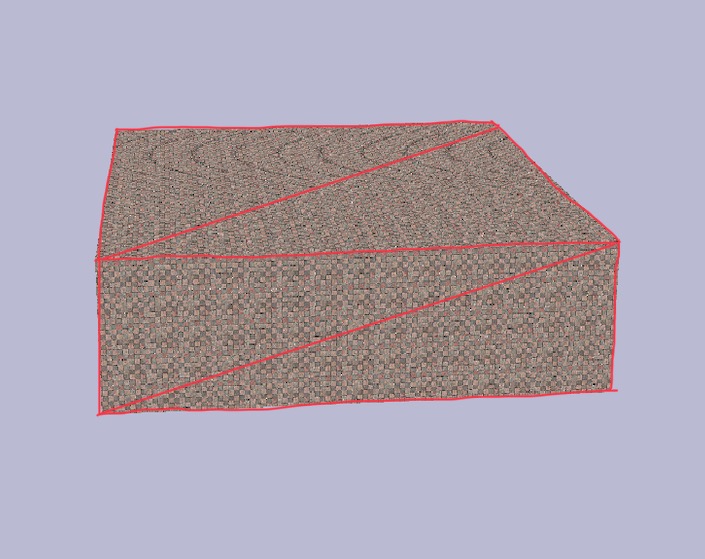
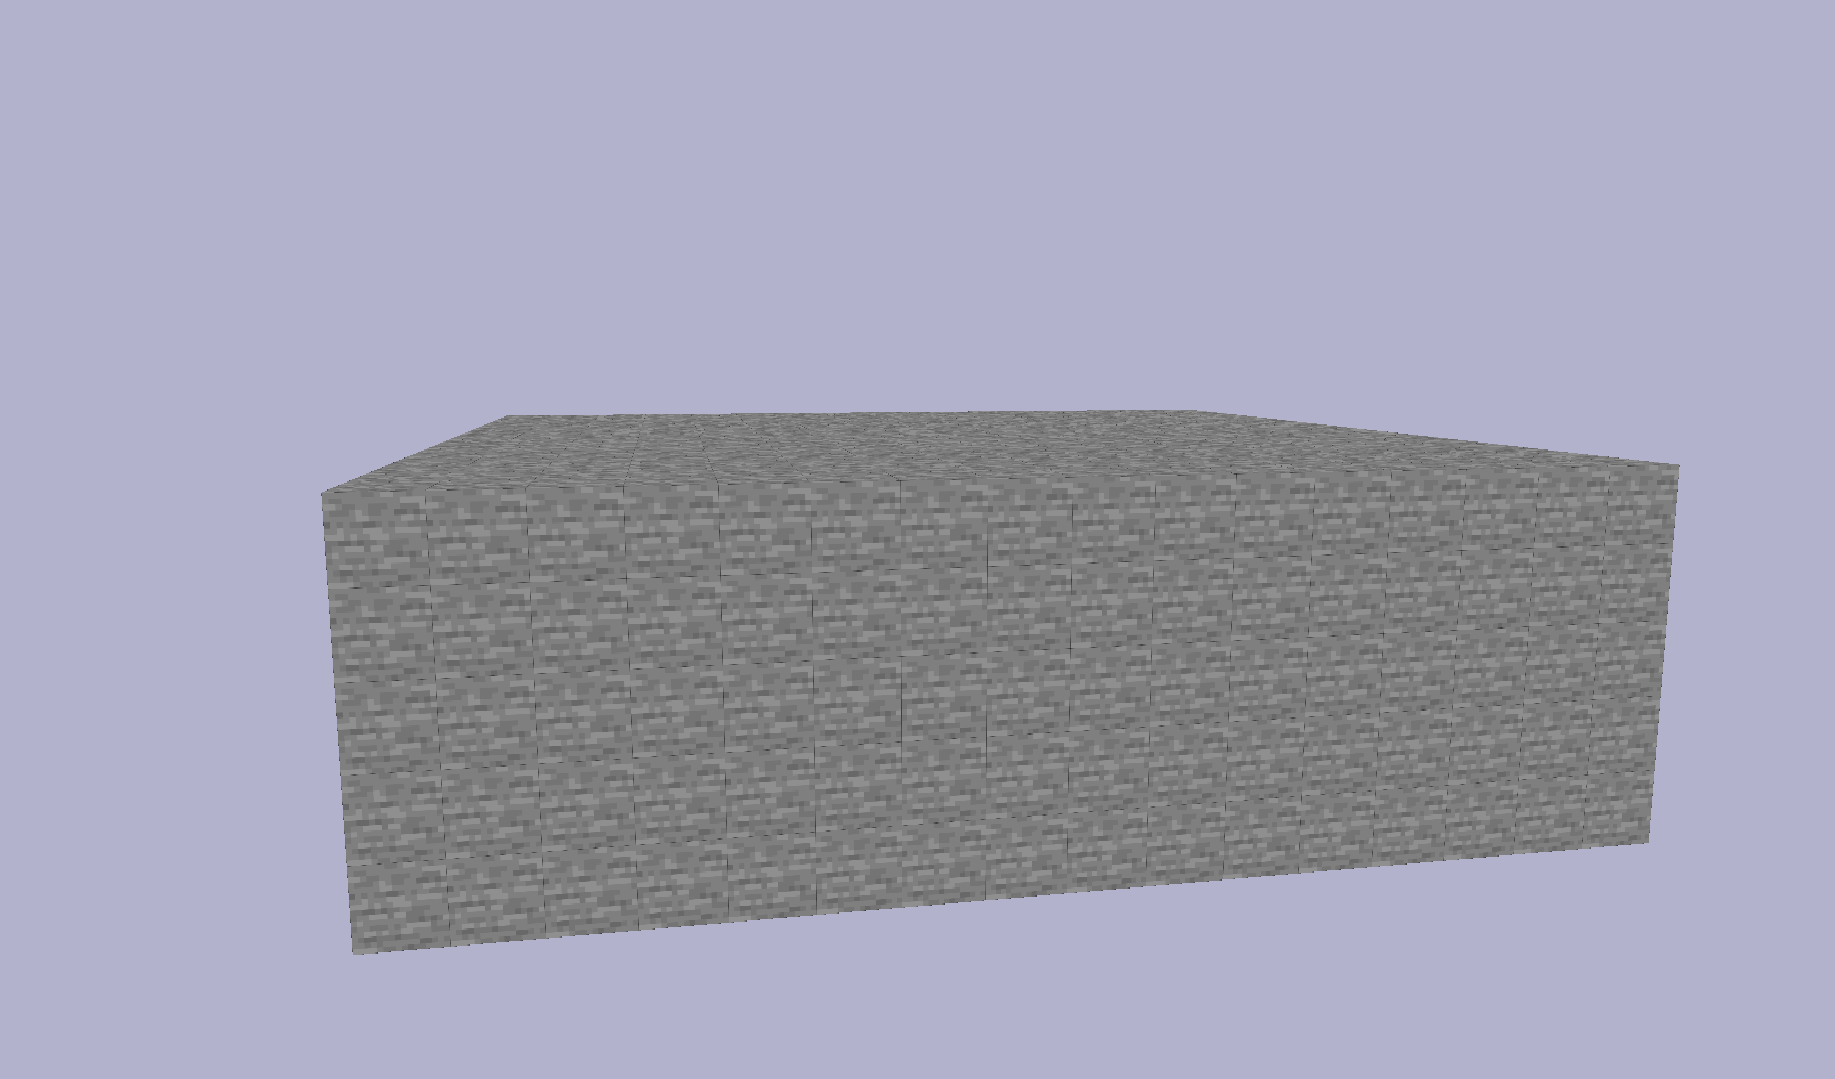
To give some perspective, this is what I really wanted, using my initial Big Rectangle to illustrate: no more vertices than absolutely necessary-
In a voxel-based world, this technique is referred to as "greedy meshing". This is an algorithm used in computer graphics to efficiently represent 3D terrain or objects. It operates by merging adjacent cubes of the same "type"" into larger, rectangular blocks, reducing the overall number of vertices needed to represent the geometry. You then tile the appropriate texture over the new triangles to give the appearance that there are many cubes there.
Textures
In games with lots of different textures (like Minecraft), a commonly used technique is "texture atlasing" is employed that reduces the number of texture switches during rendering by packing every texture into one consolidated image. I was really interested in implementing this in my model, so I started by using this online tool to pack my textures and generate an associated JSON file. The JSON file held the coordinates of each image in the consolidated file. This was the result:
Then, I needed to associate each cube in the game with a "type" (I just used a simple enum), and sample the appropriate region of the texture atlas when it was that
cube's turn in the rendering pipeline.
Here's a mistake and a success that happened while I was trying to get the texture atlas working for the first time, on a chunk of "stone" type cubes- the mistake happened because I wasn't calculating
the coordinate offsets correctly and it ended up just printing the whole atlas on each cube:
I eventually decided to do away with the serialized data in favour of handling the control flow in my fragment shader, since I don't plan to introduce more textures to this model. Here's the shader if you're curious.
Rendering Generated Terrain
I've talked a lot now about how I was drawing out each cube, but I haven't really outlined what it's all working towards. Here's a brief rundown of how a voxel-based
world like Minecraft or RustWorld generates terrain. A 3D space is divided into volumetric elements, each representing points in the environment. In this context,
a voxel is a cube. Then, a noise algorithm is applied (I exclusively used Perlin noise, but other types are widely used and layered)
to determine the types/heights of elements within the voxel grid. When you look at Minecraft, for example, there is no "empty space". The air is all cubes too, because the whole
thing is a 3D grid of them.
For chunk generation in RustWorld, cube types are determined by the noise value generated for that position in the chunk grid, and the type and location of each cube is passed to an OpenGL draw call. This means that the world is immutable, but achieves my goal of rendering a
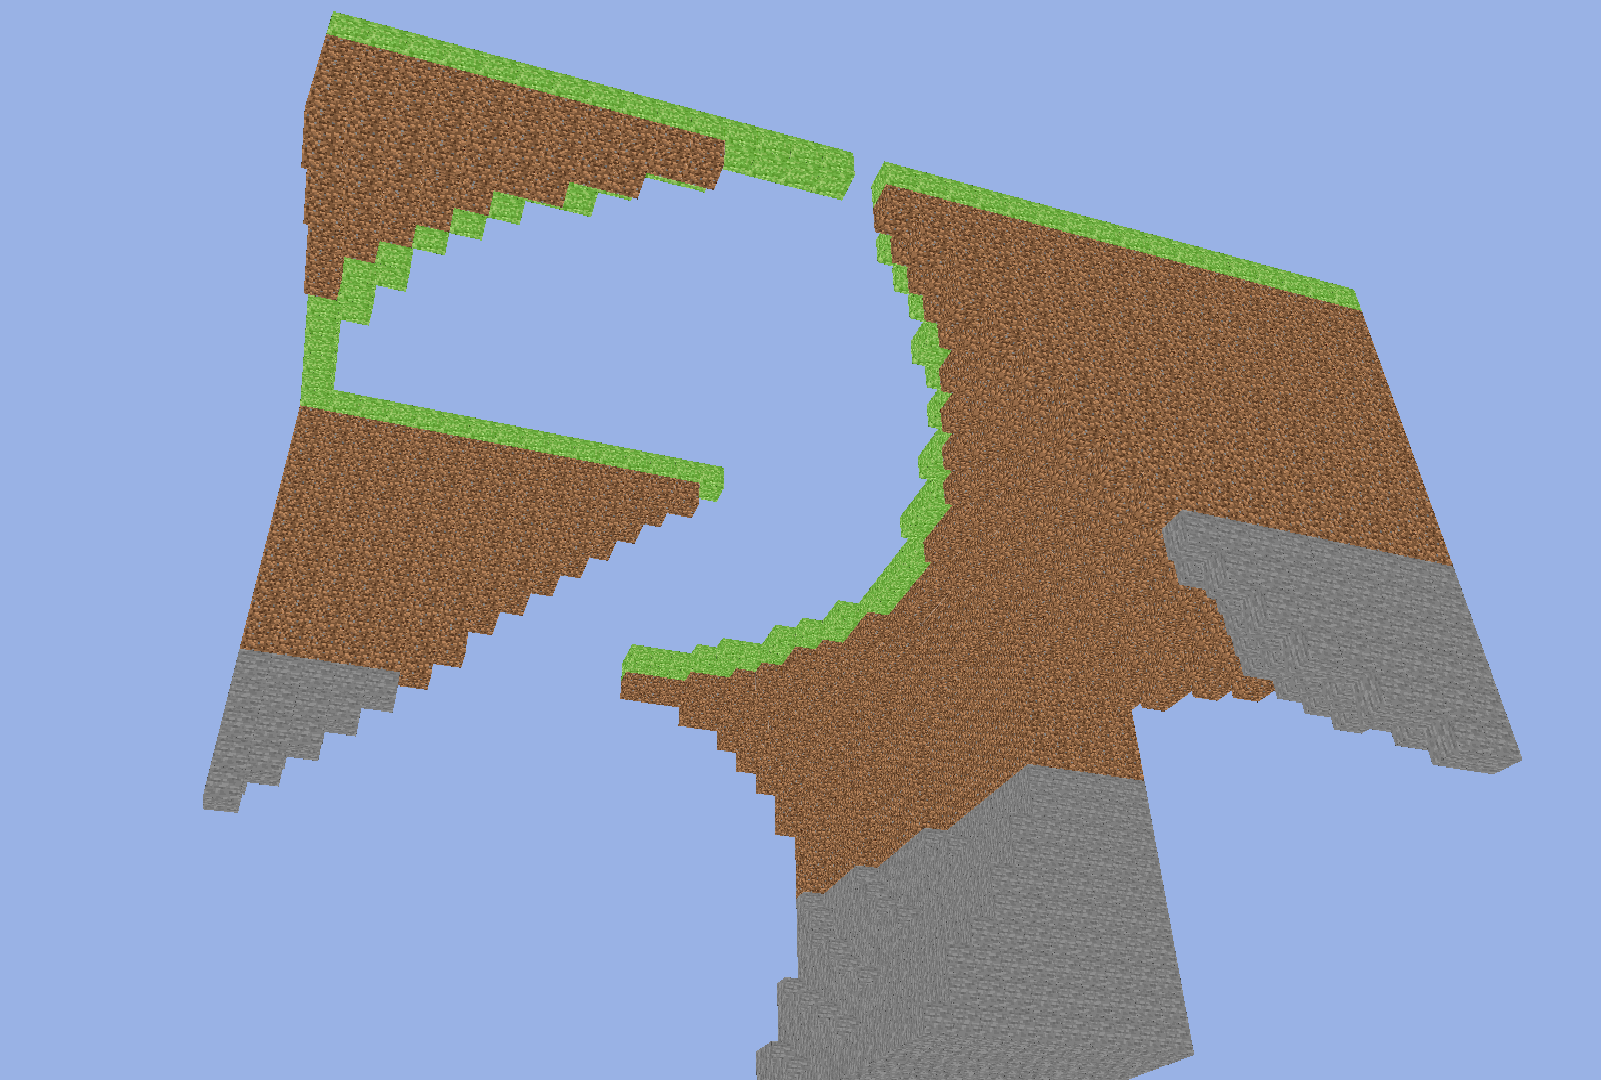
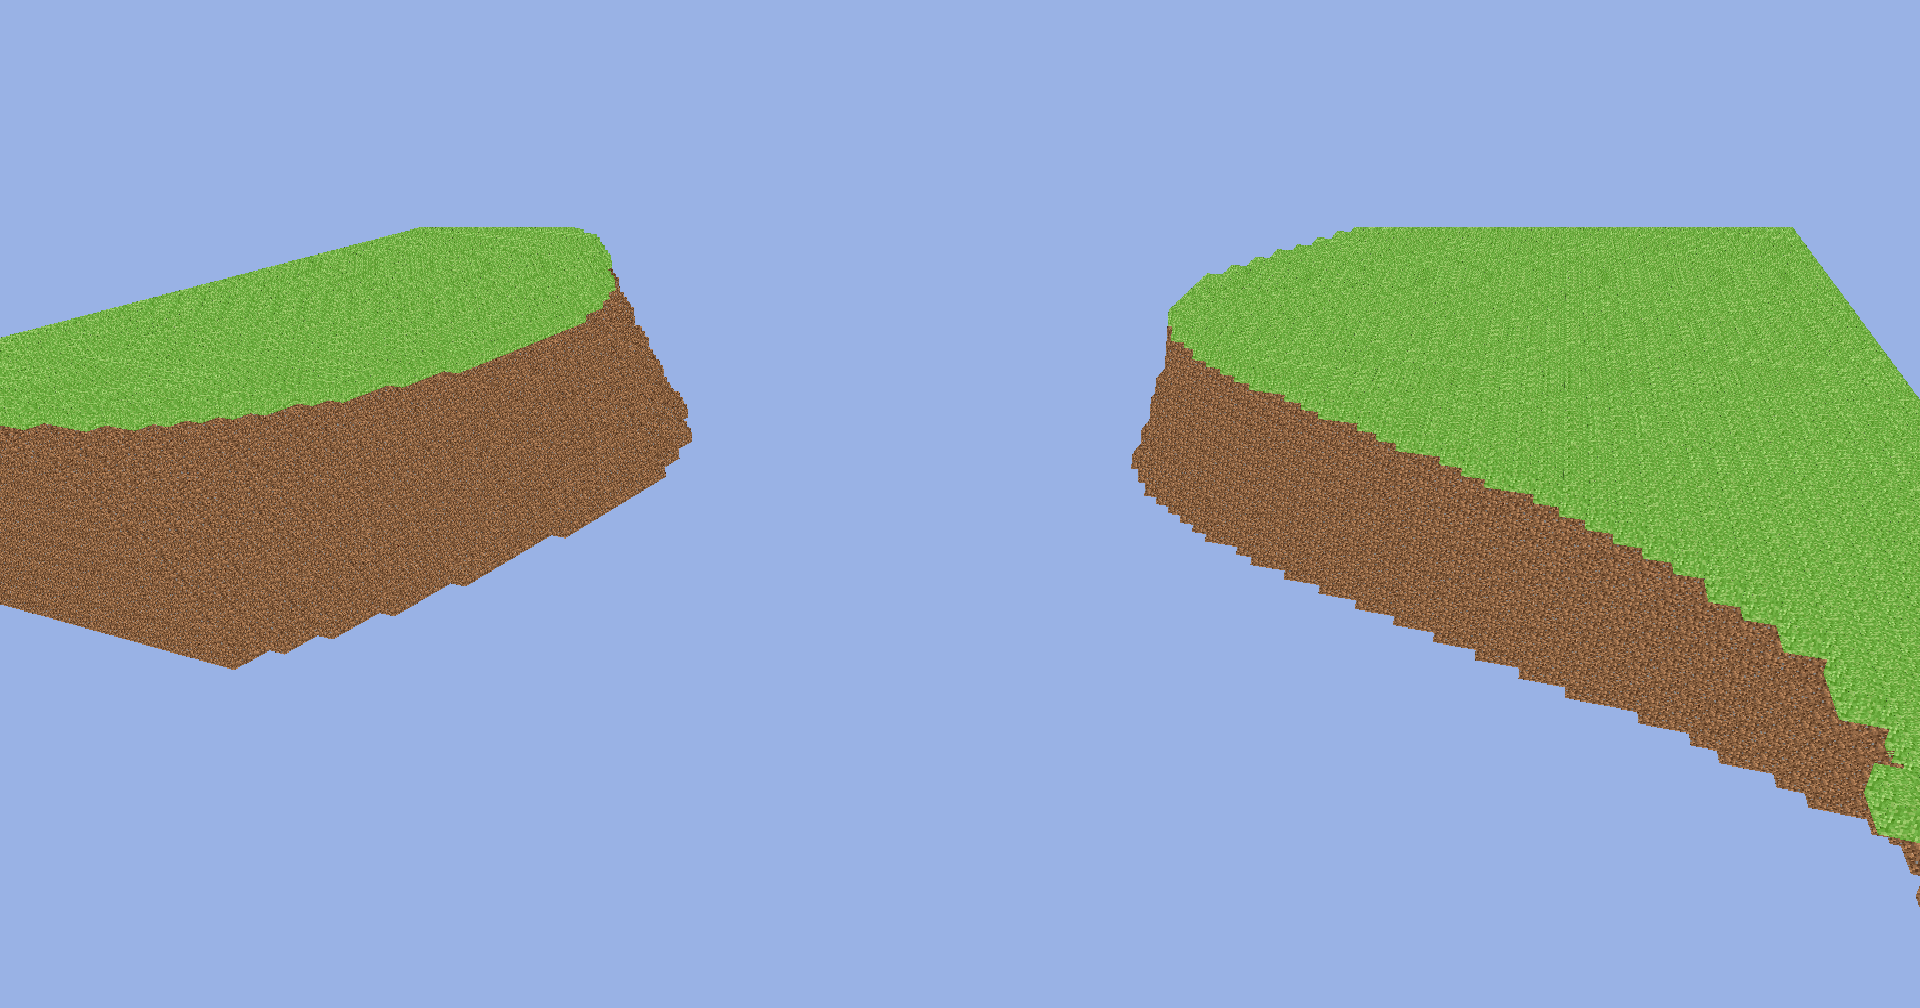
terrain model. I didn't realize in my first attempts that you were supposed to use the same seed to generate noise for anything meant to be connected, so I was confused that I started out
with harsh lines between each chunk when I started terrain generation:
With the revelation of using the same seed across all chunks, I started to be really happy with the results.
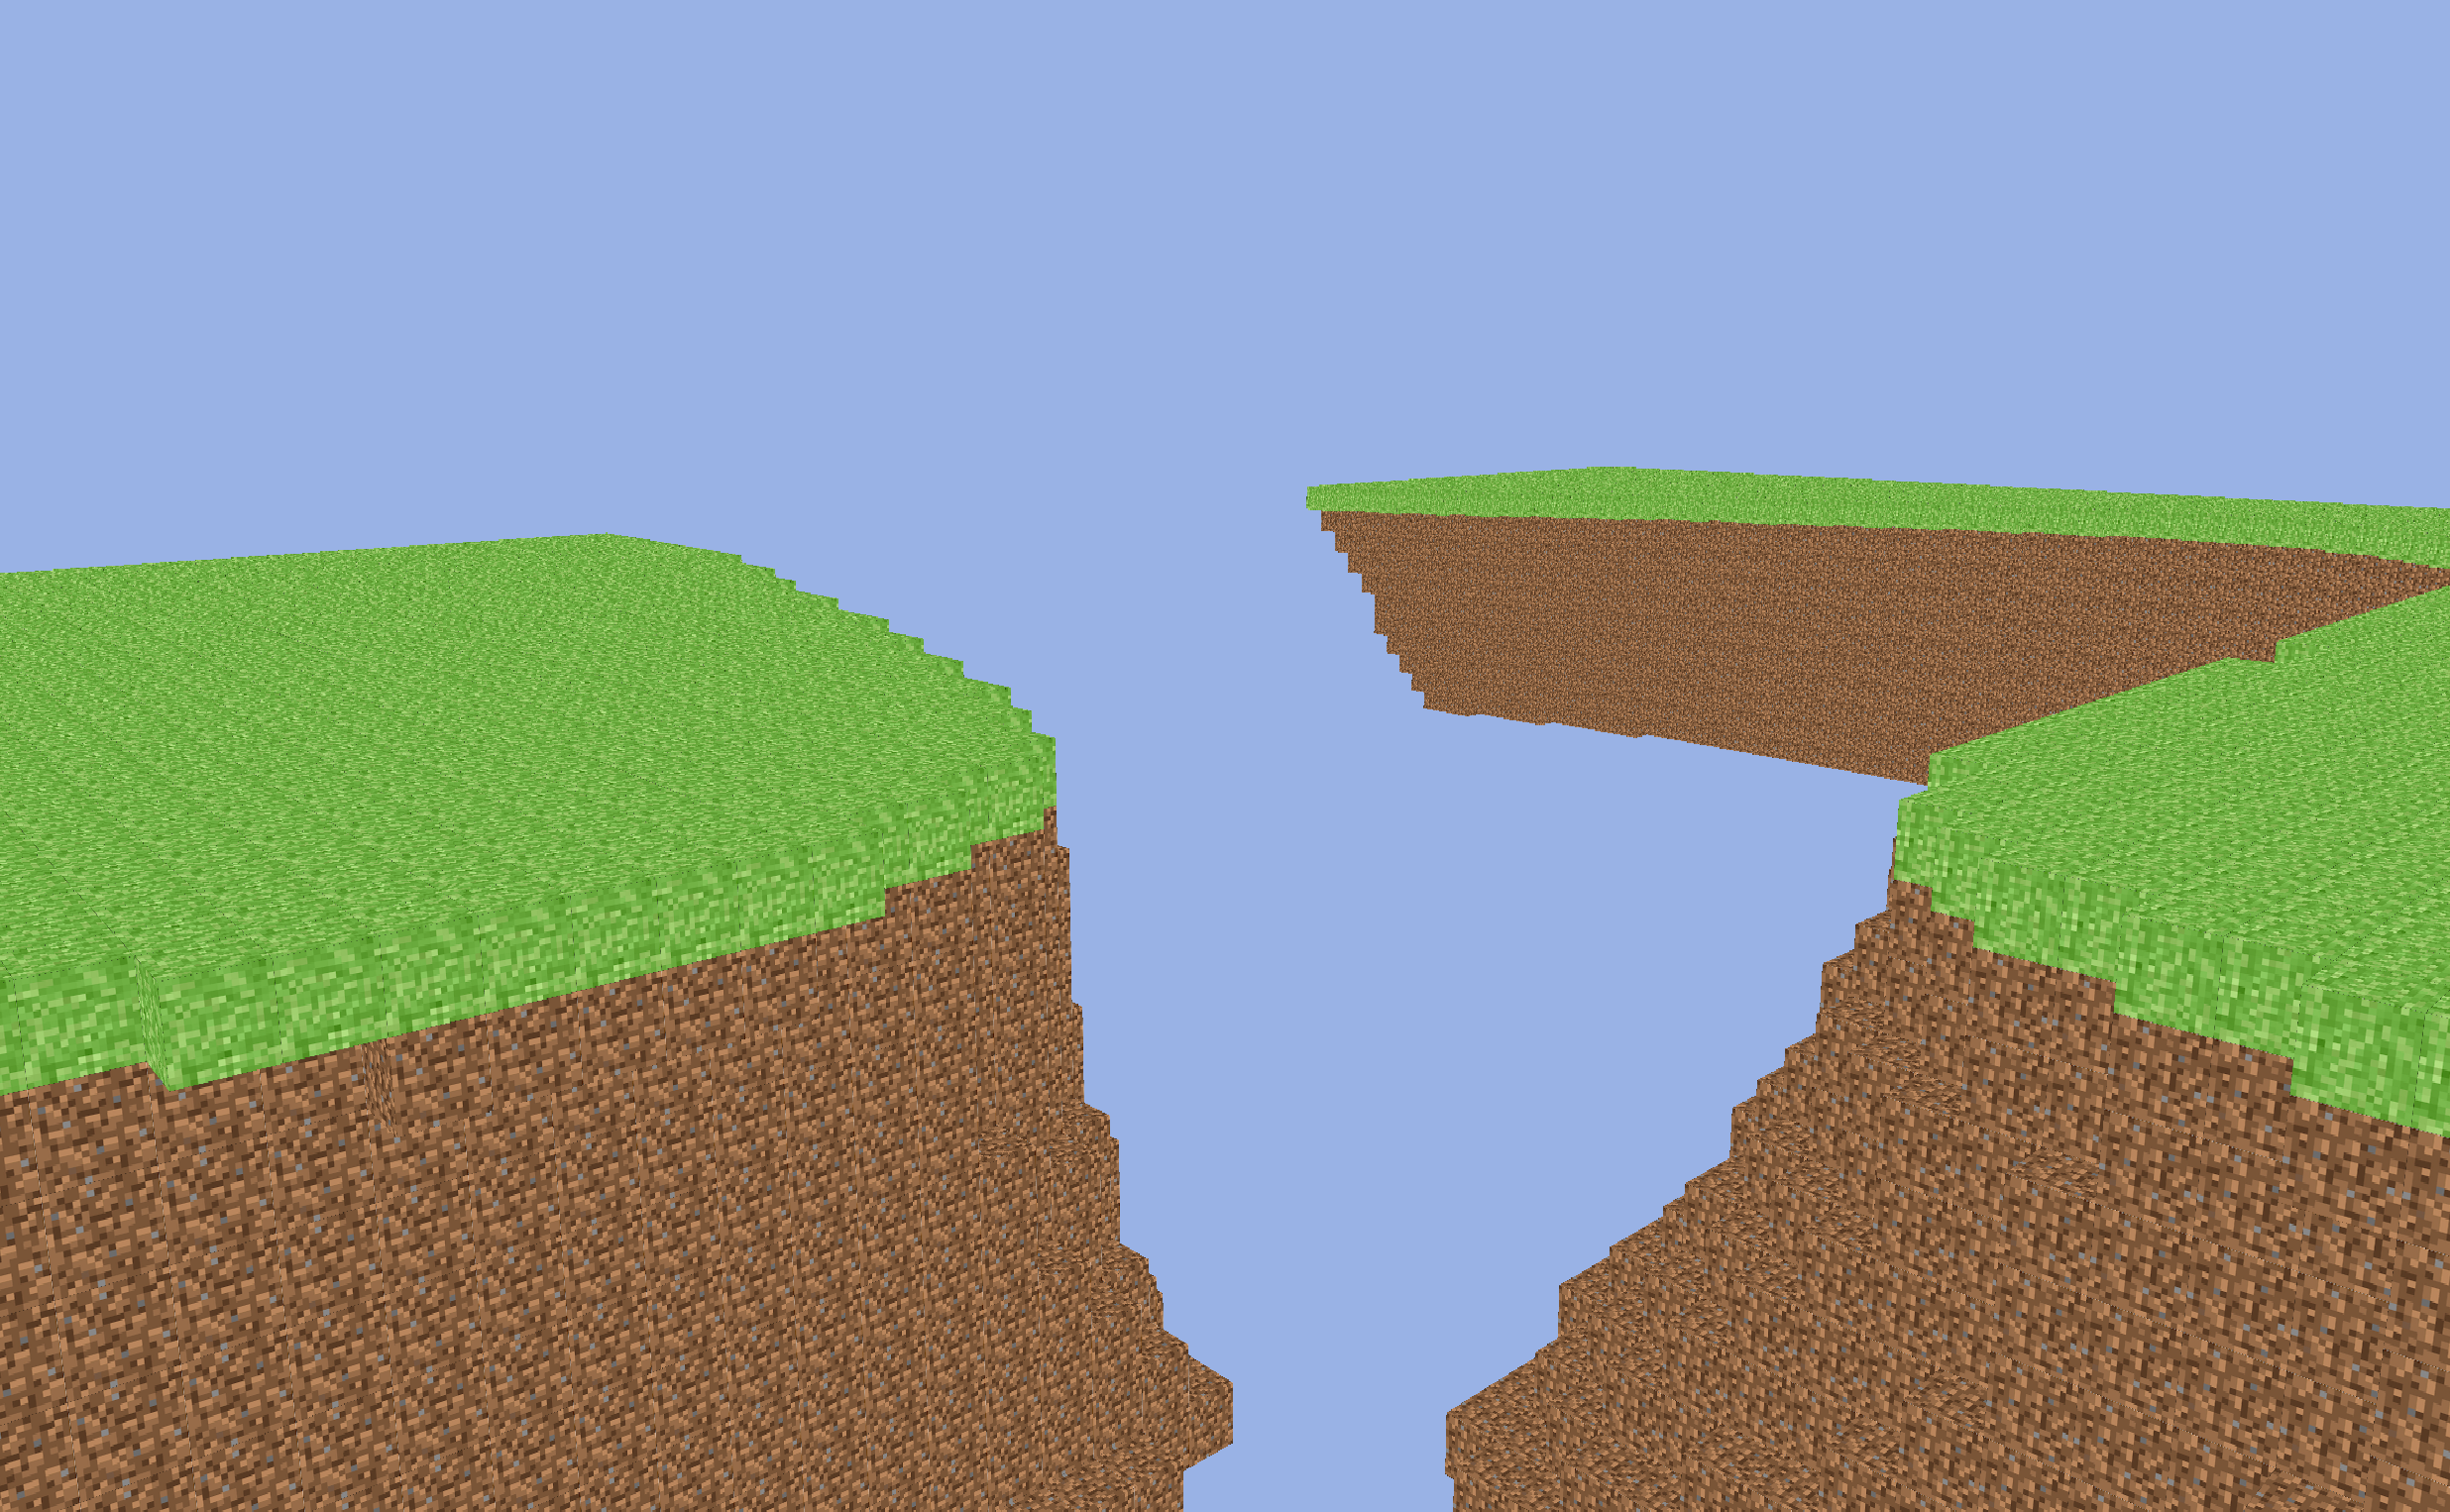
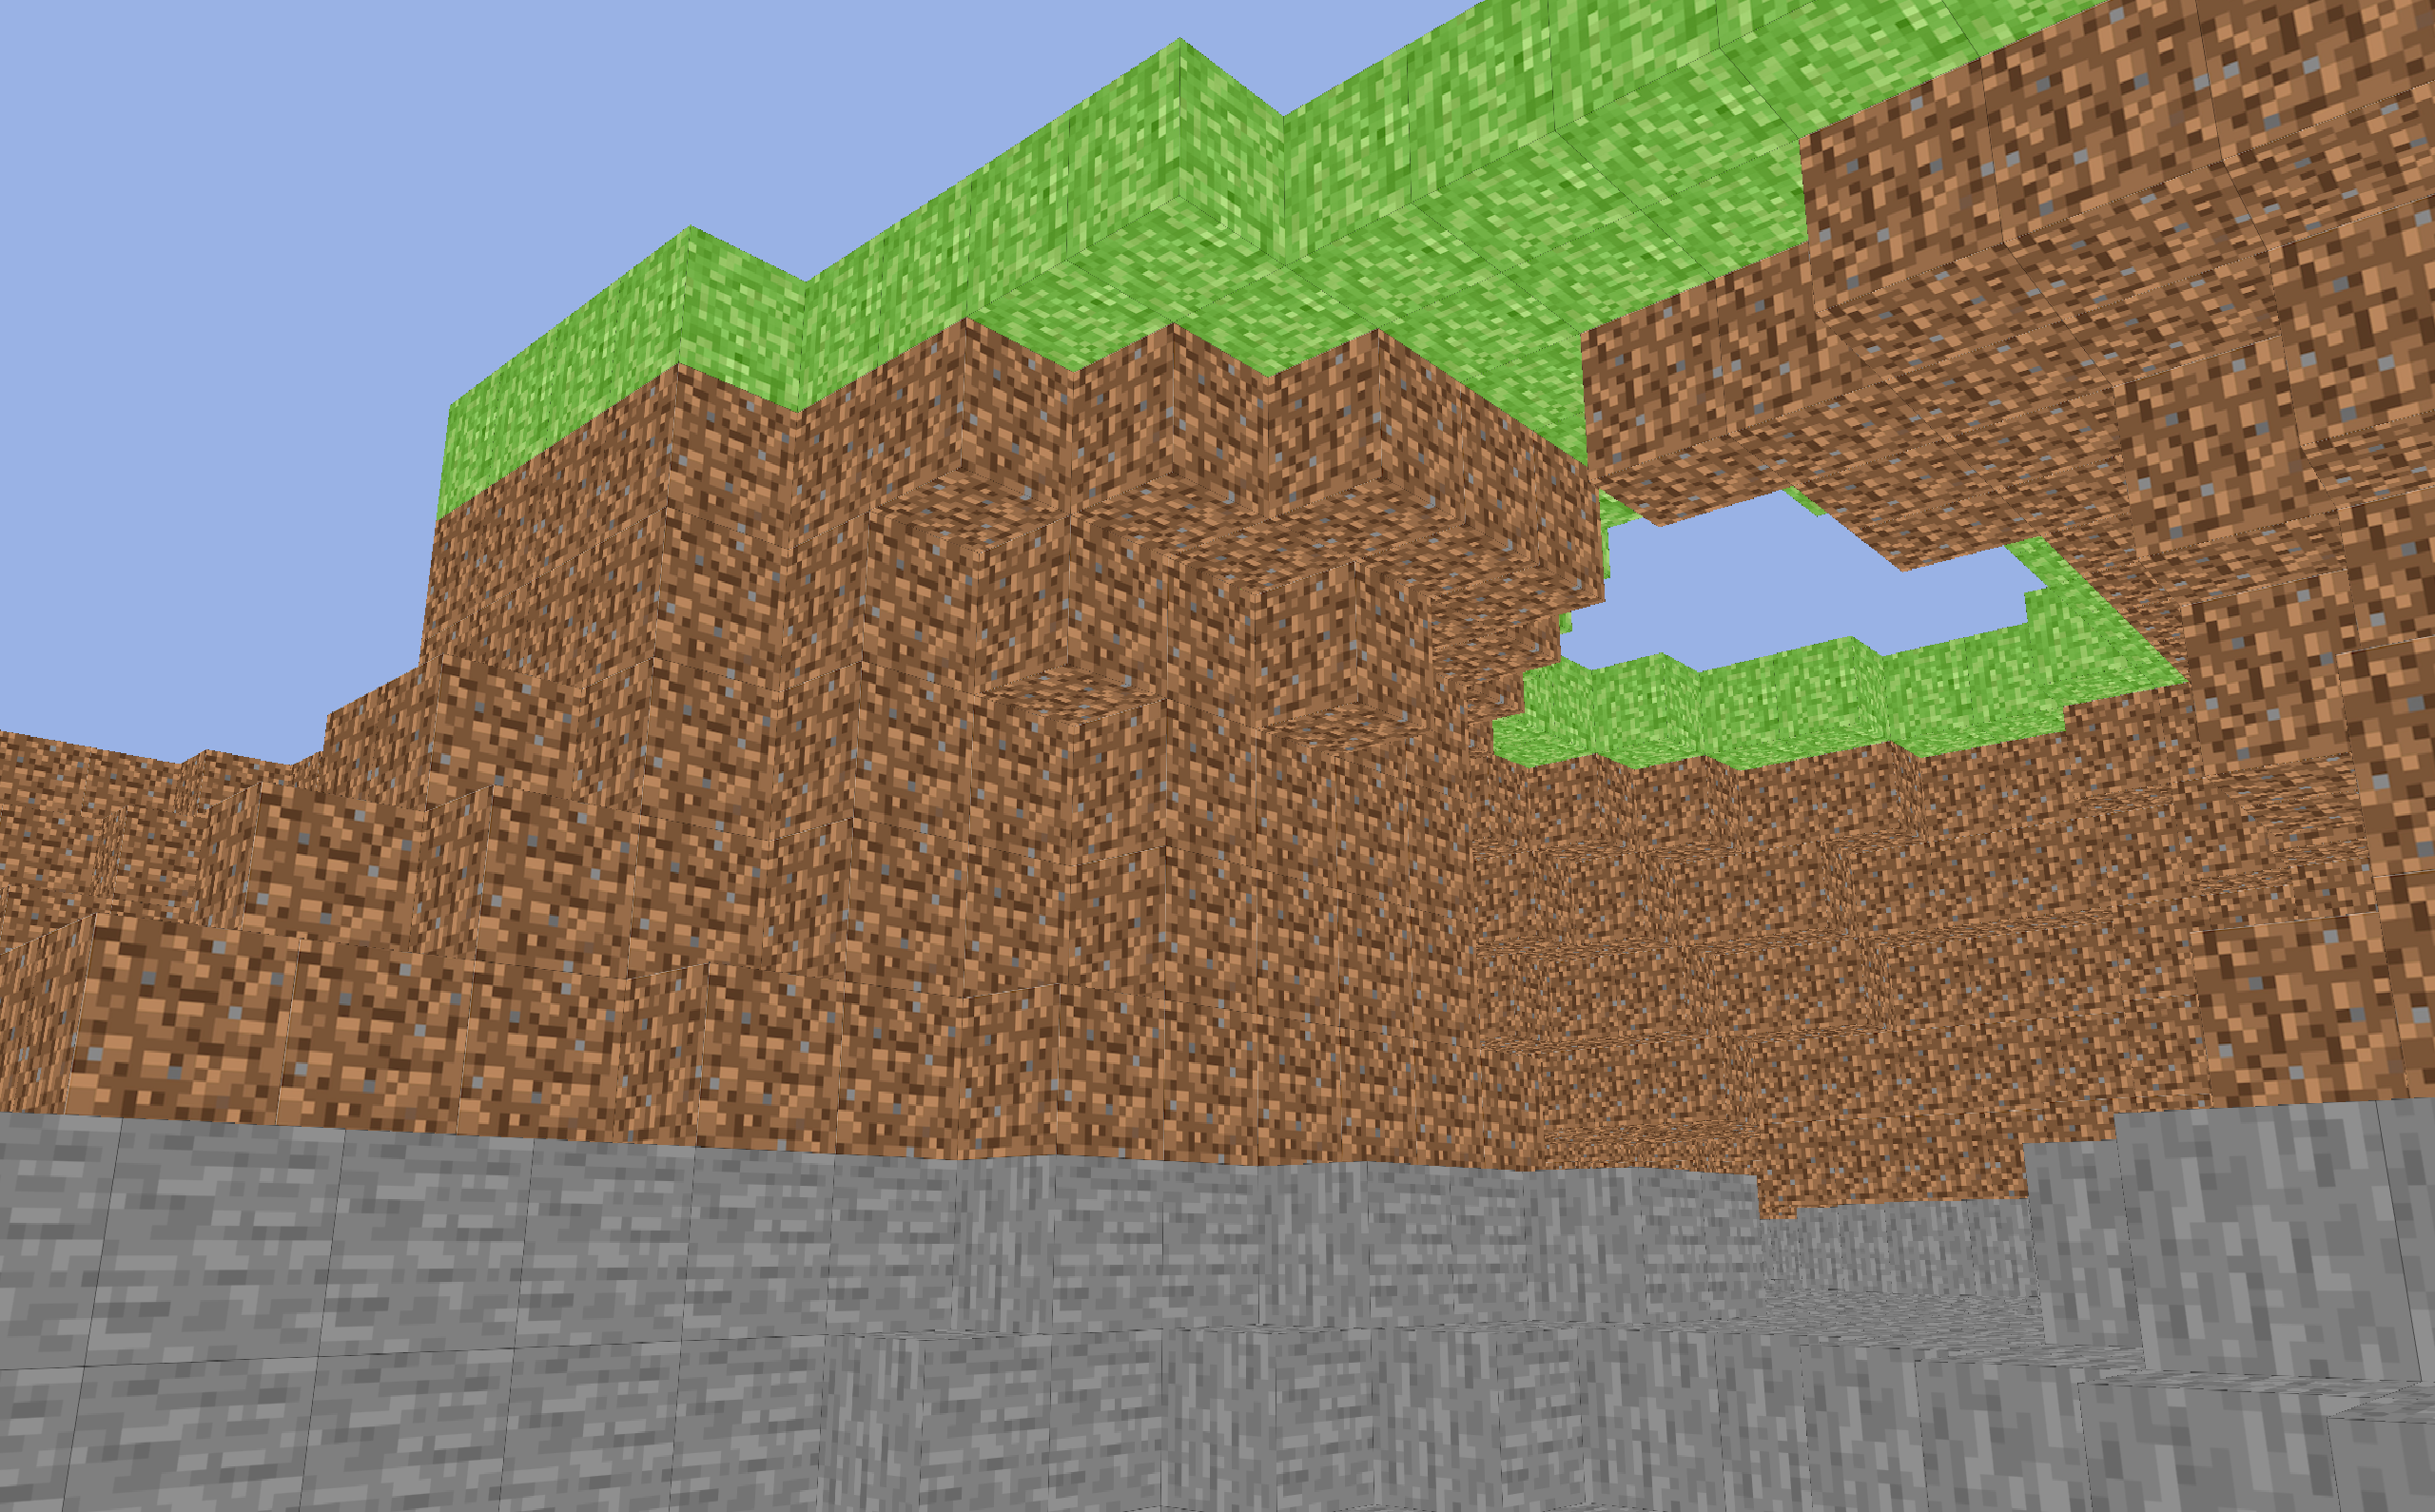
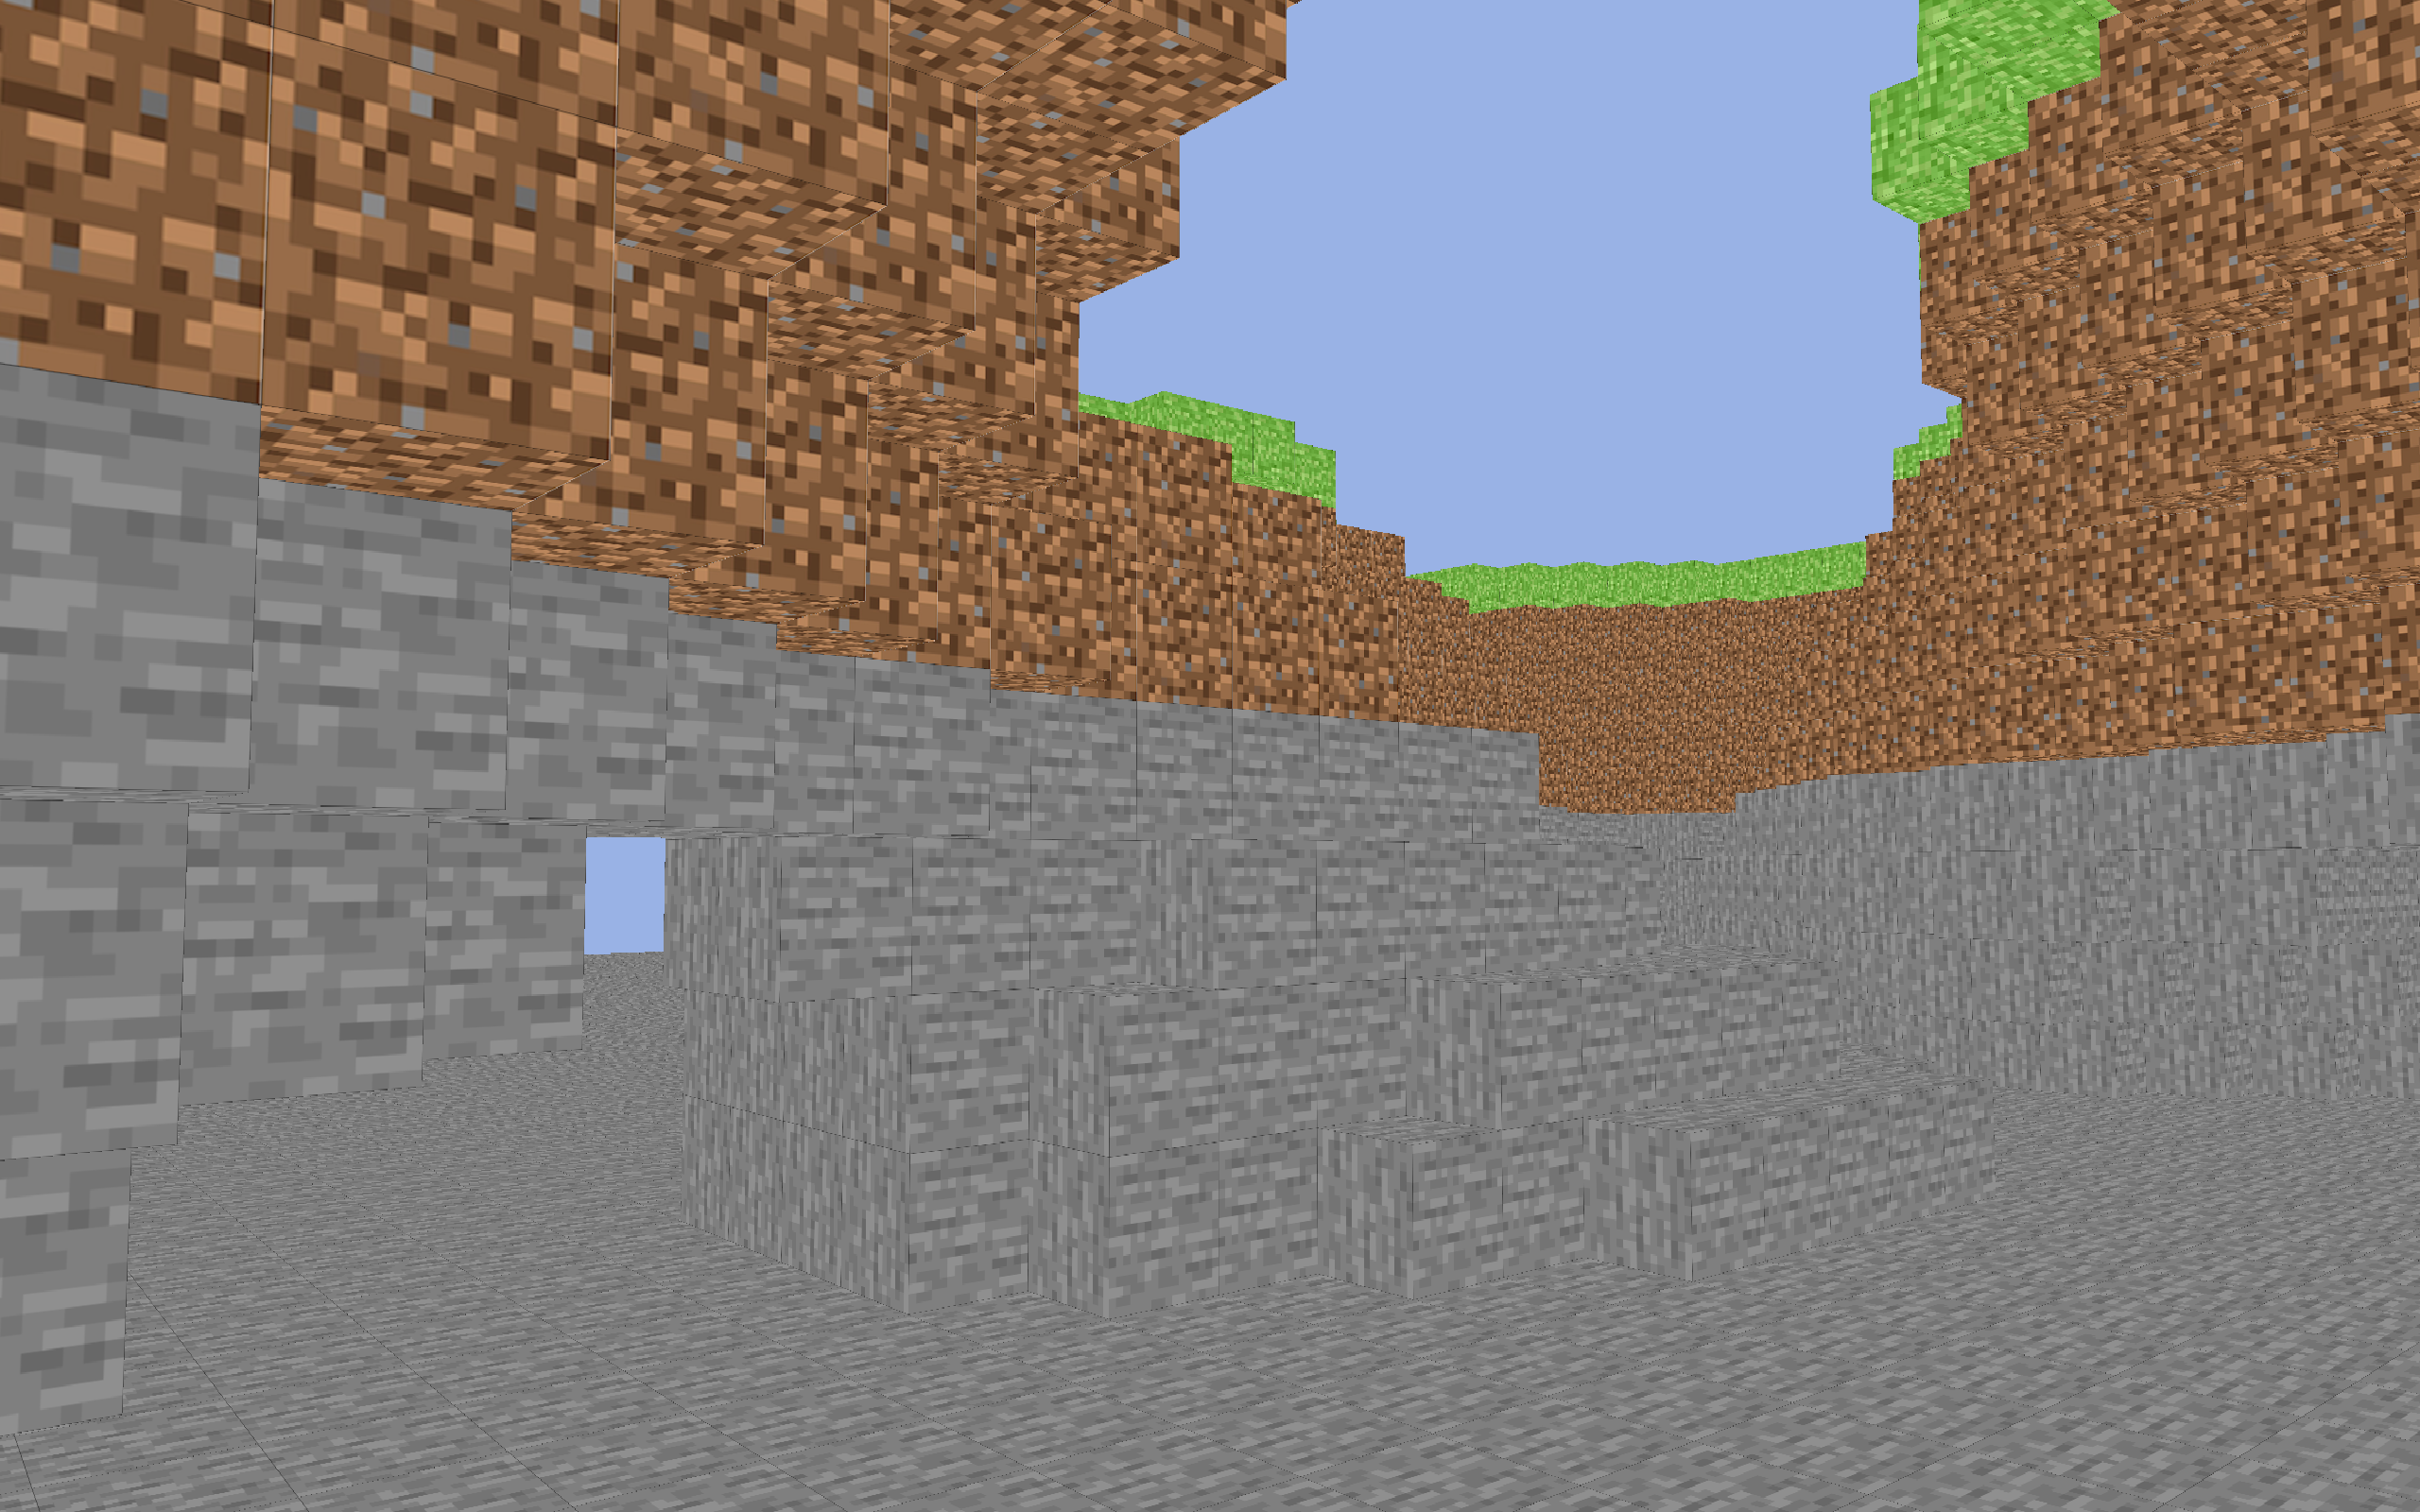
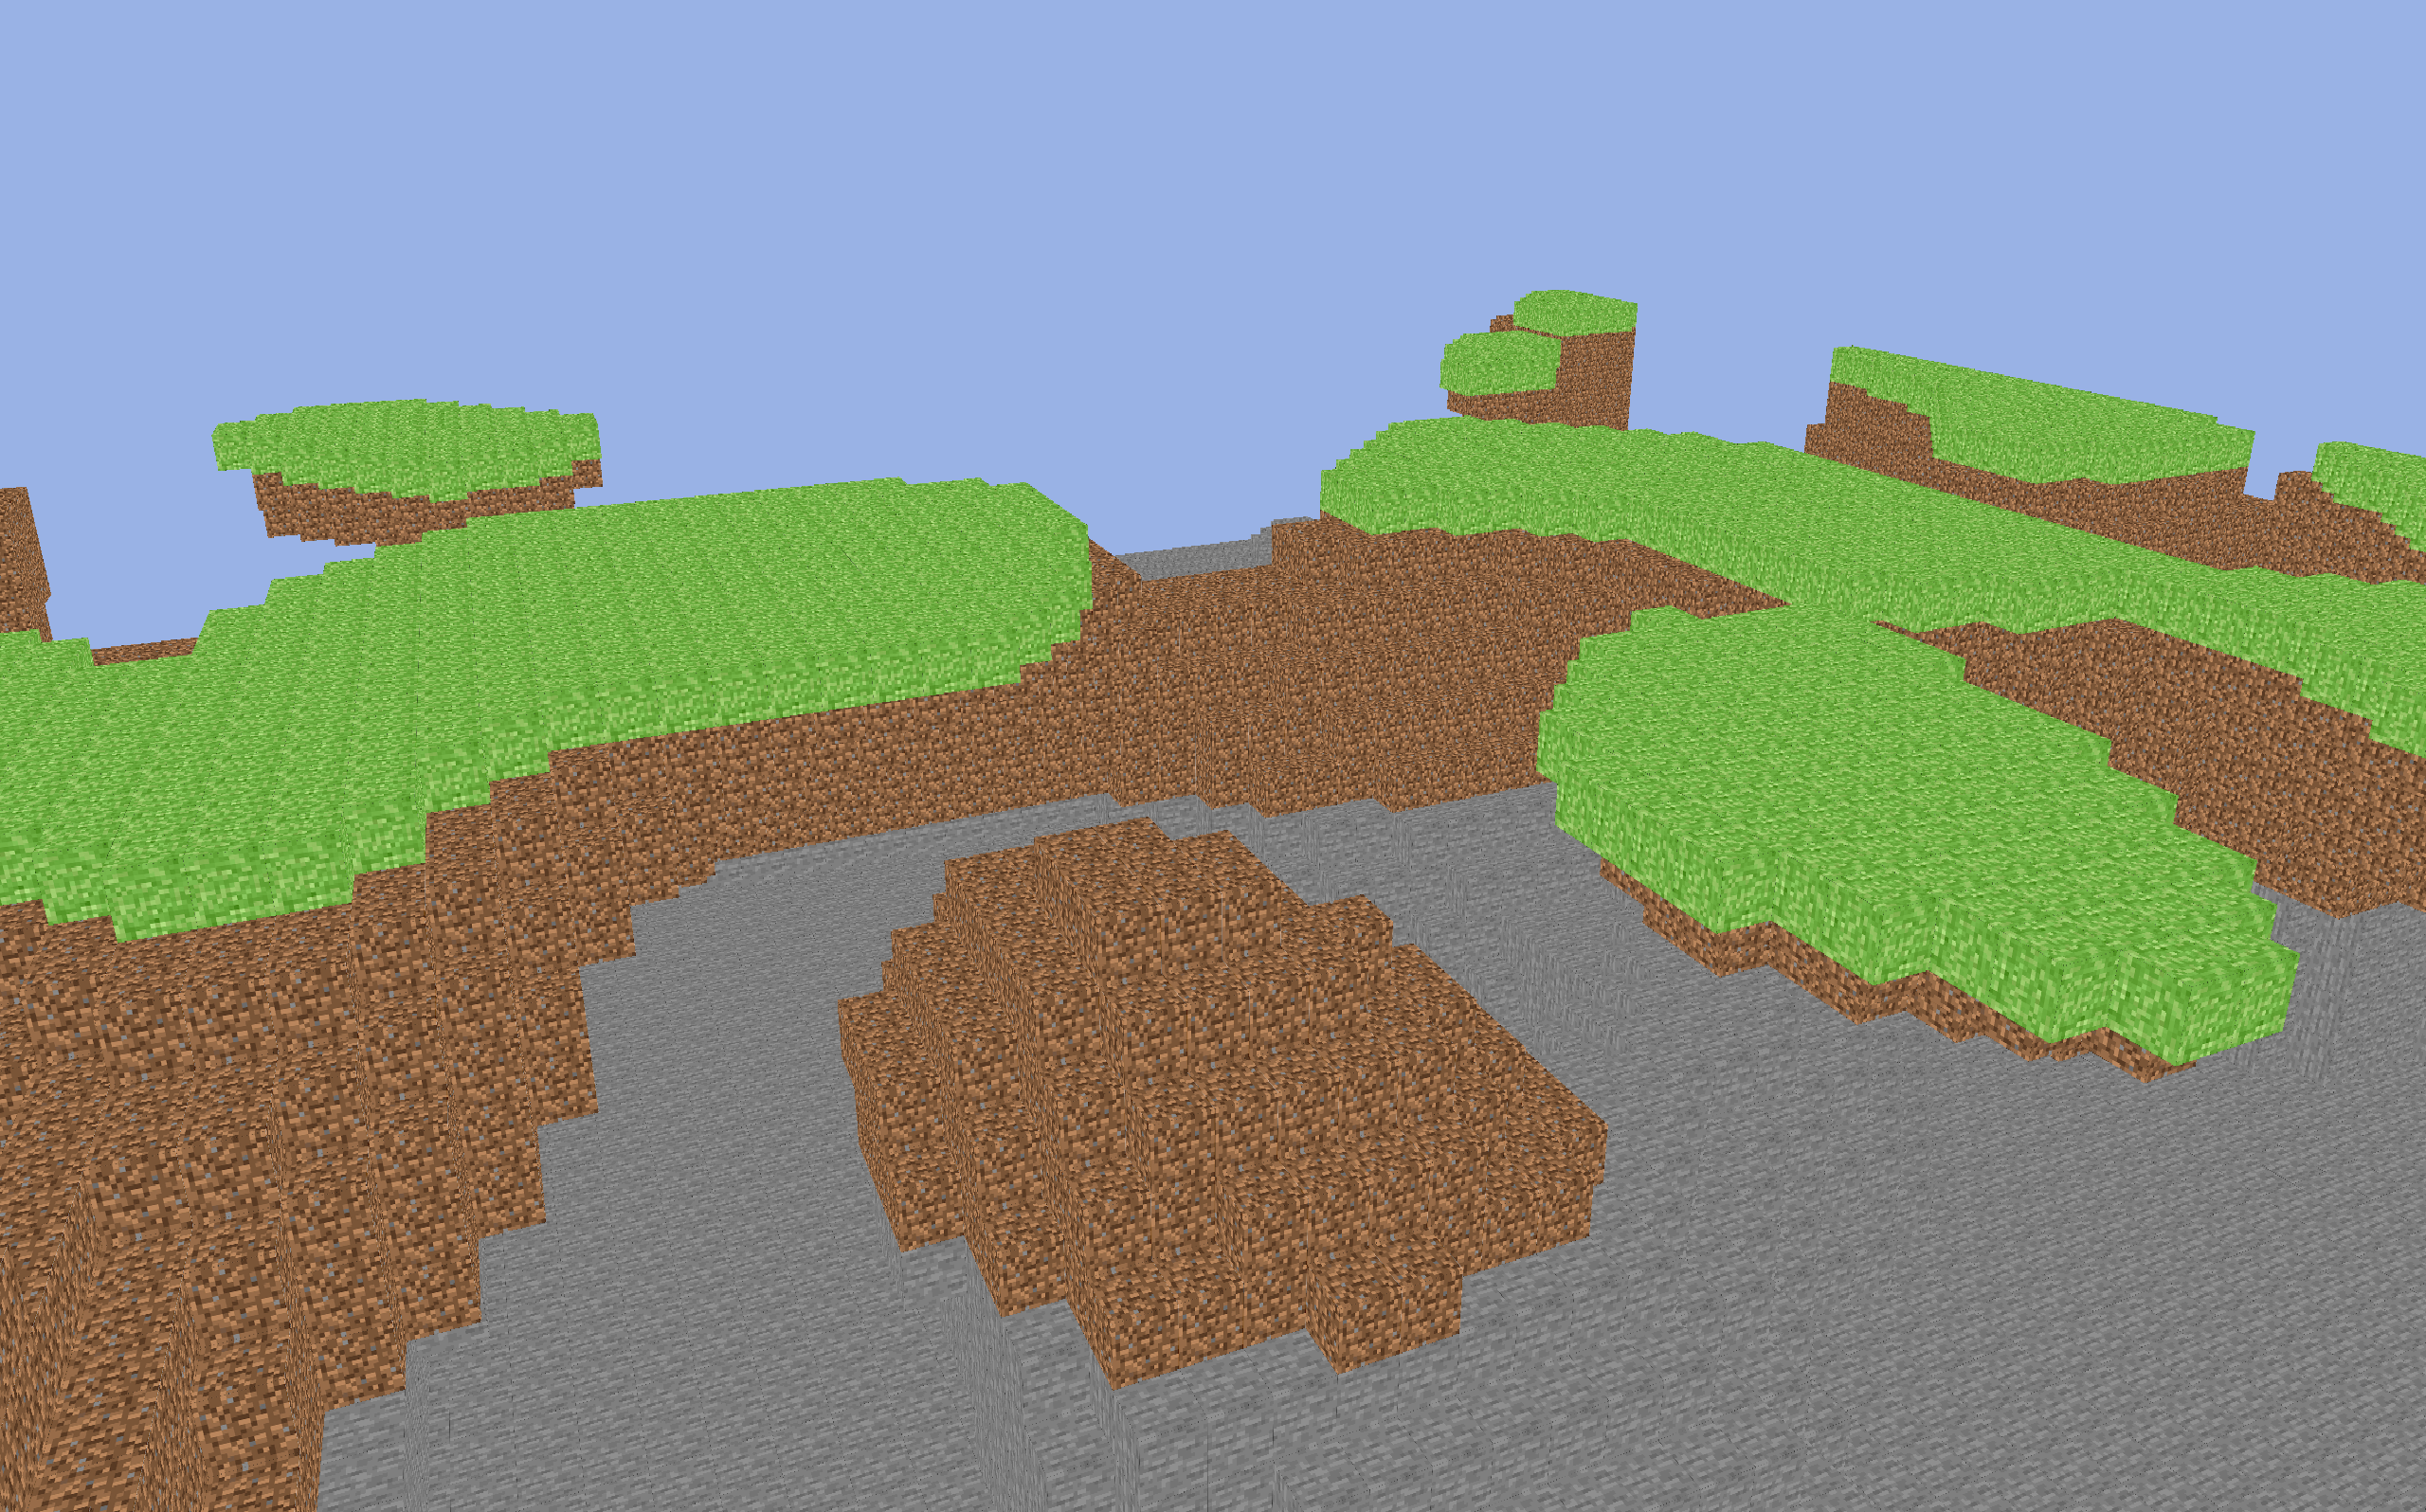
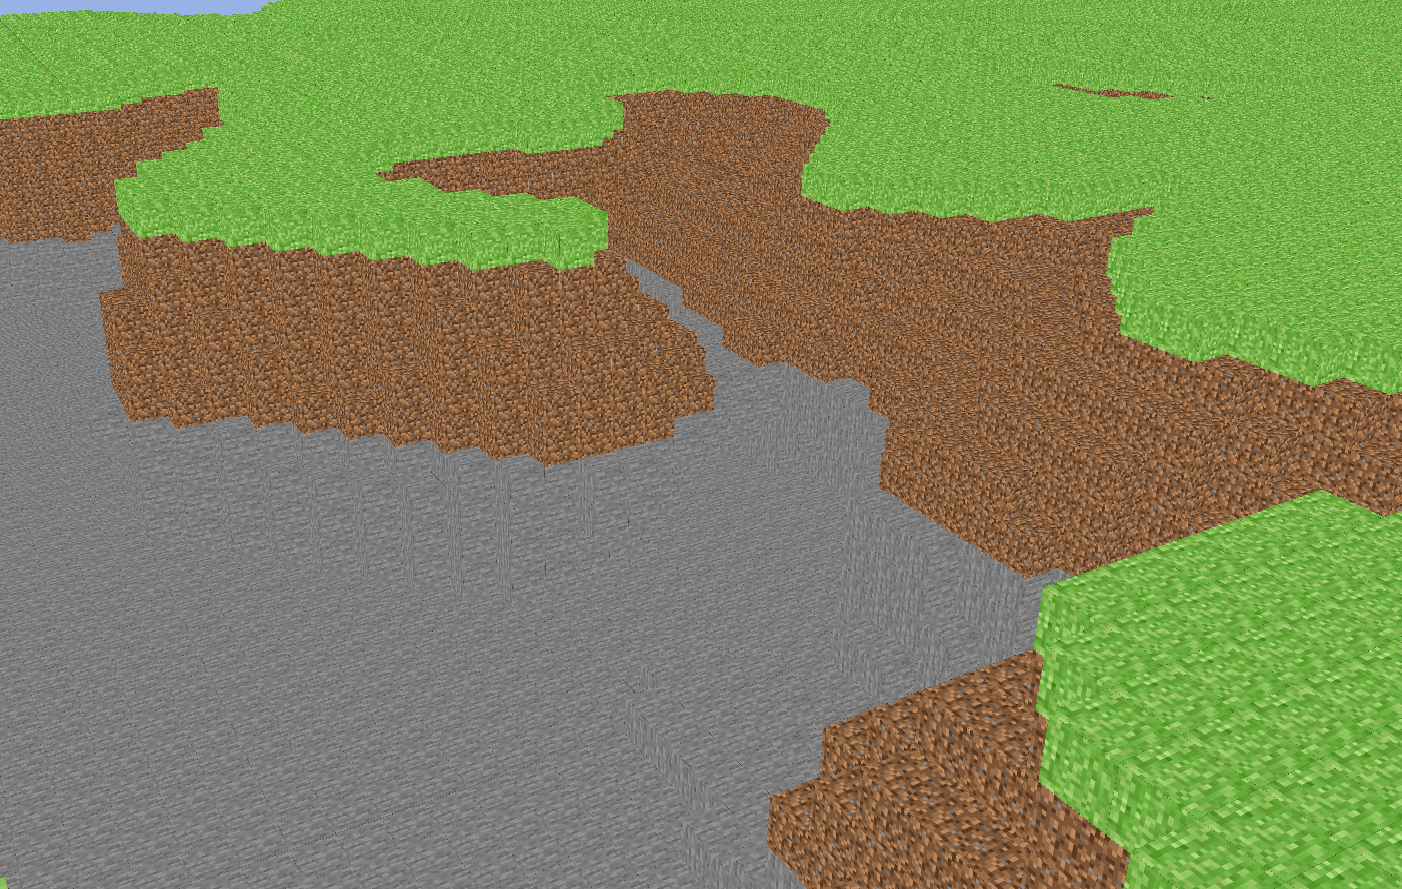
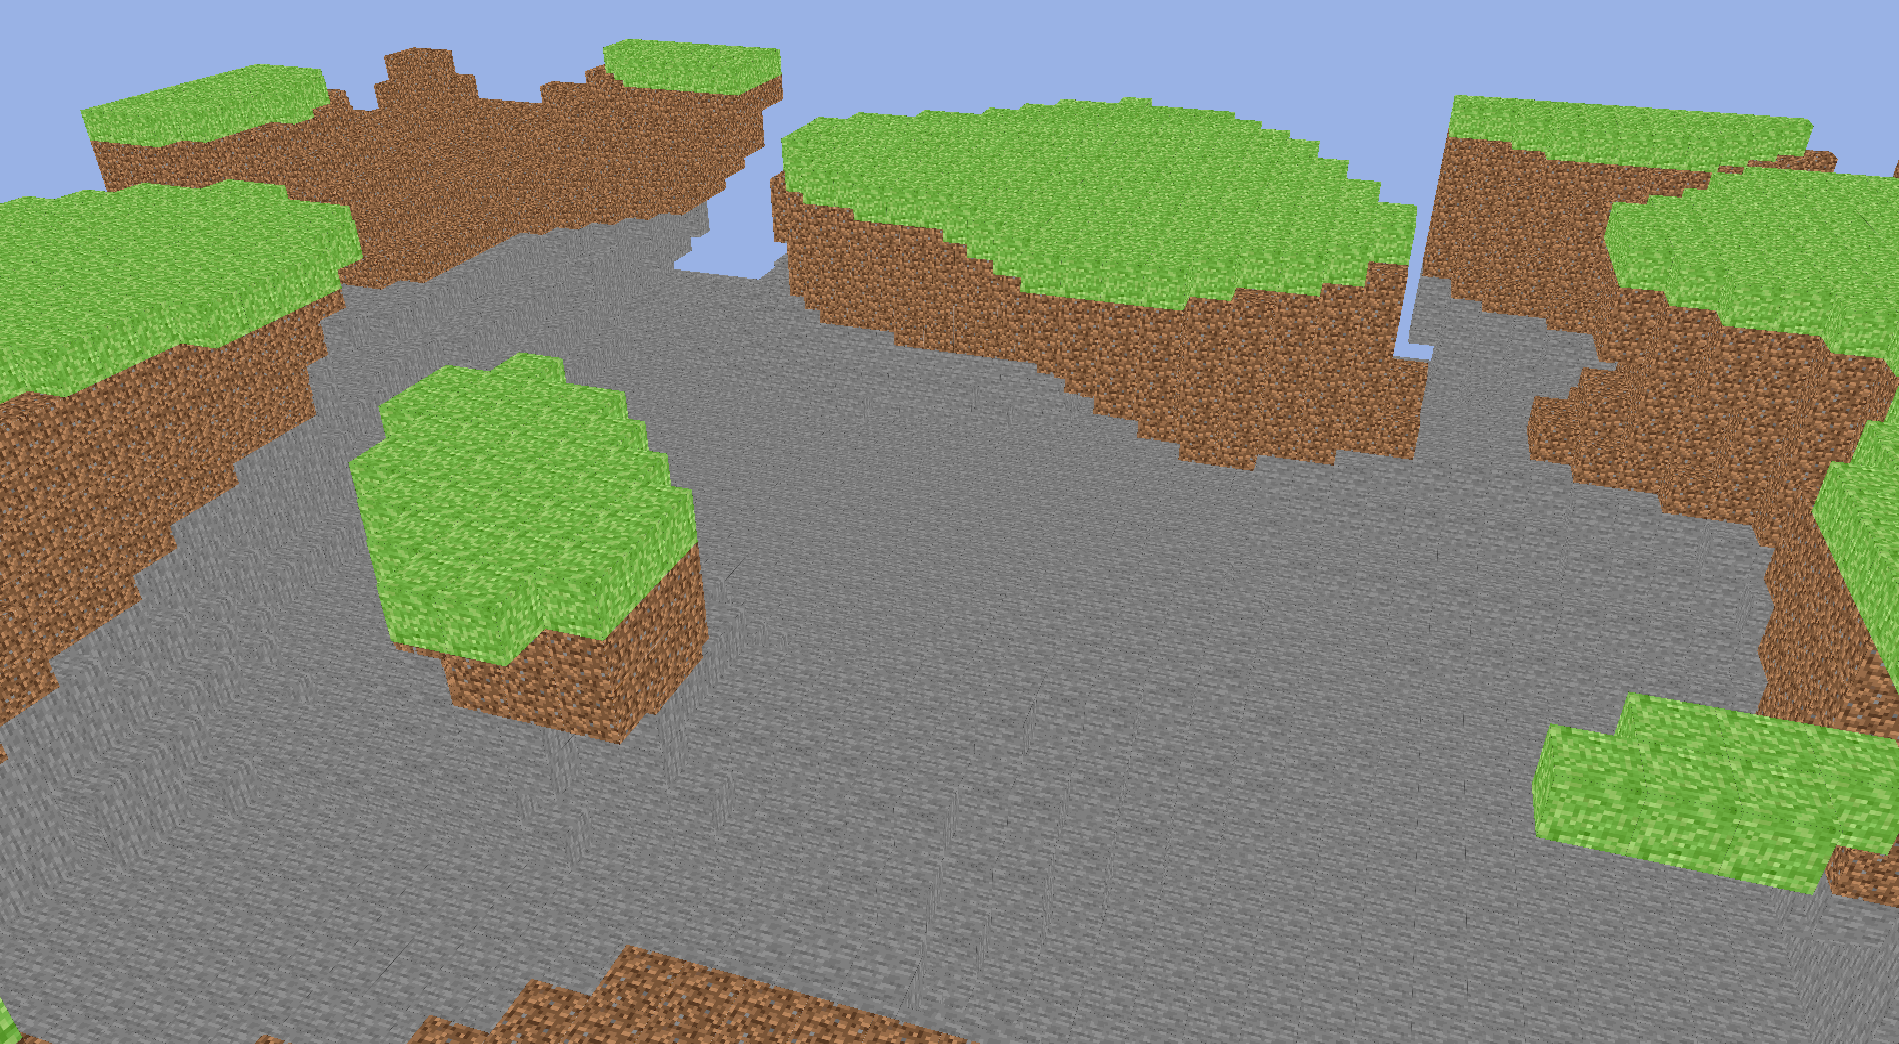
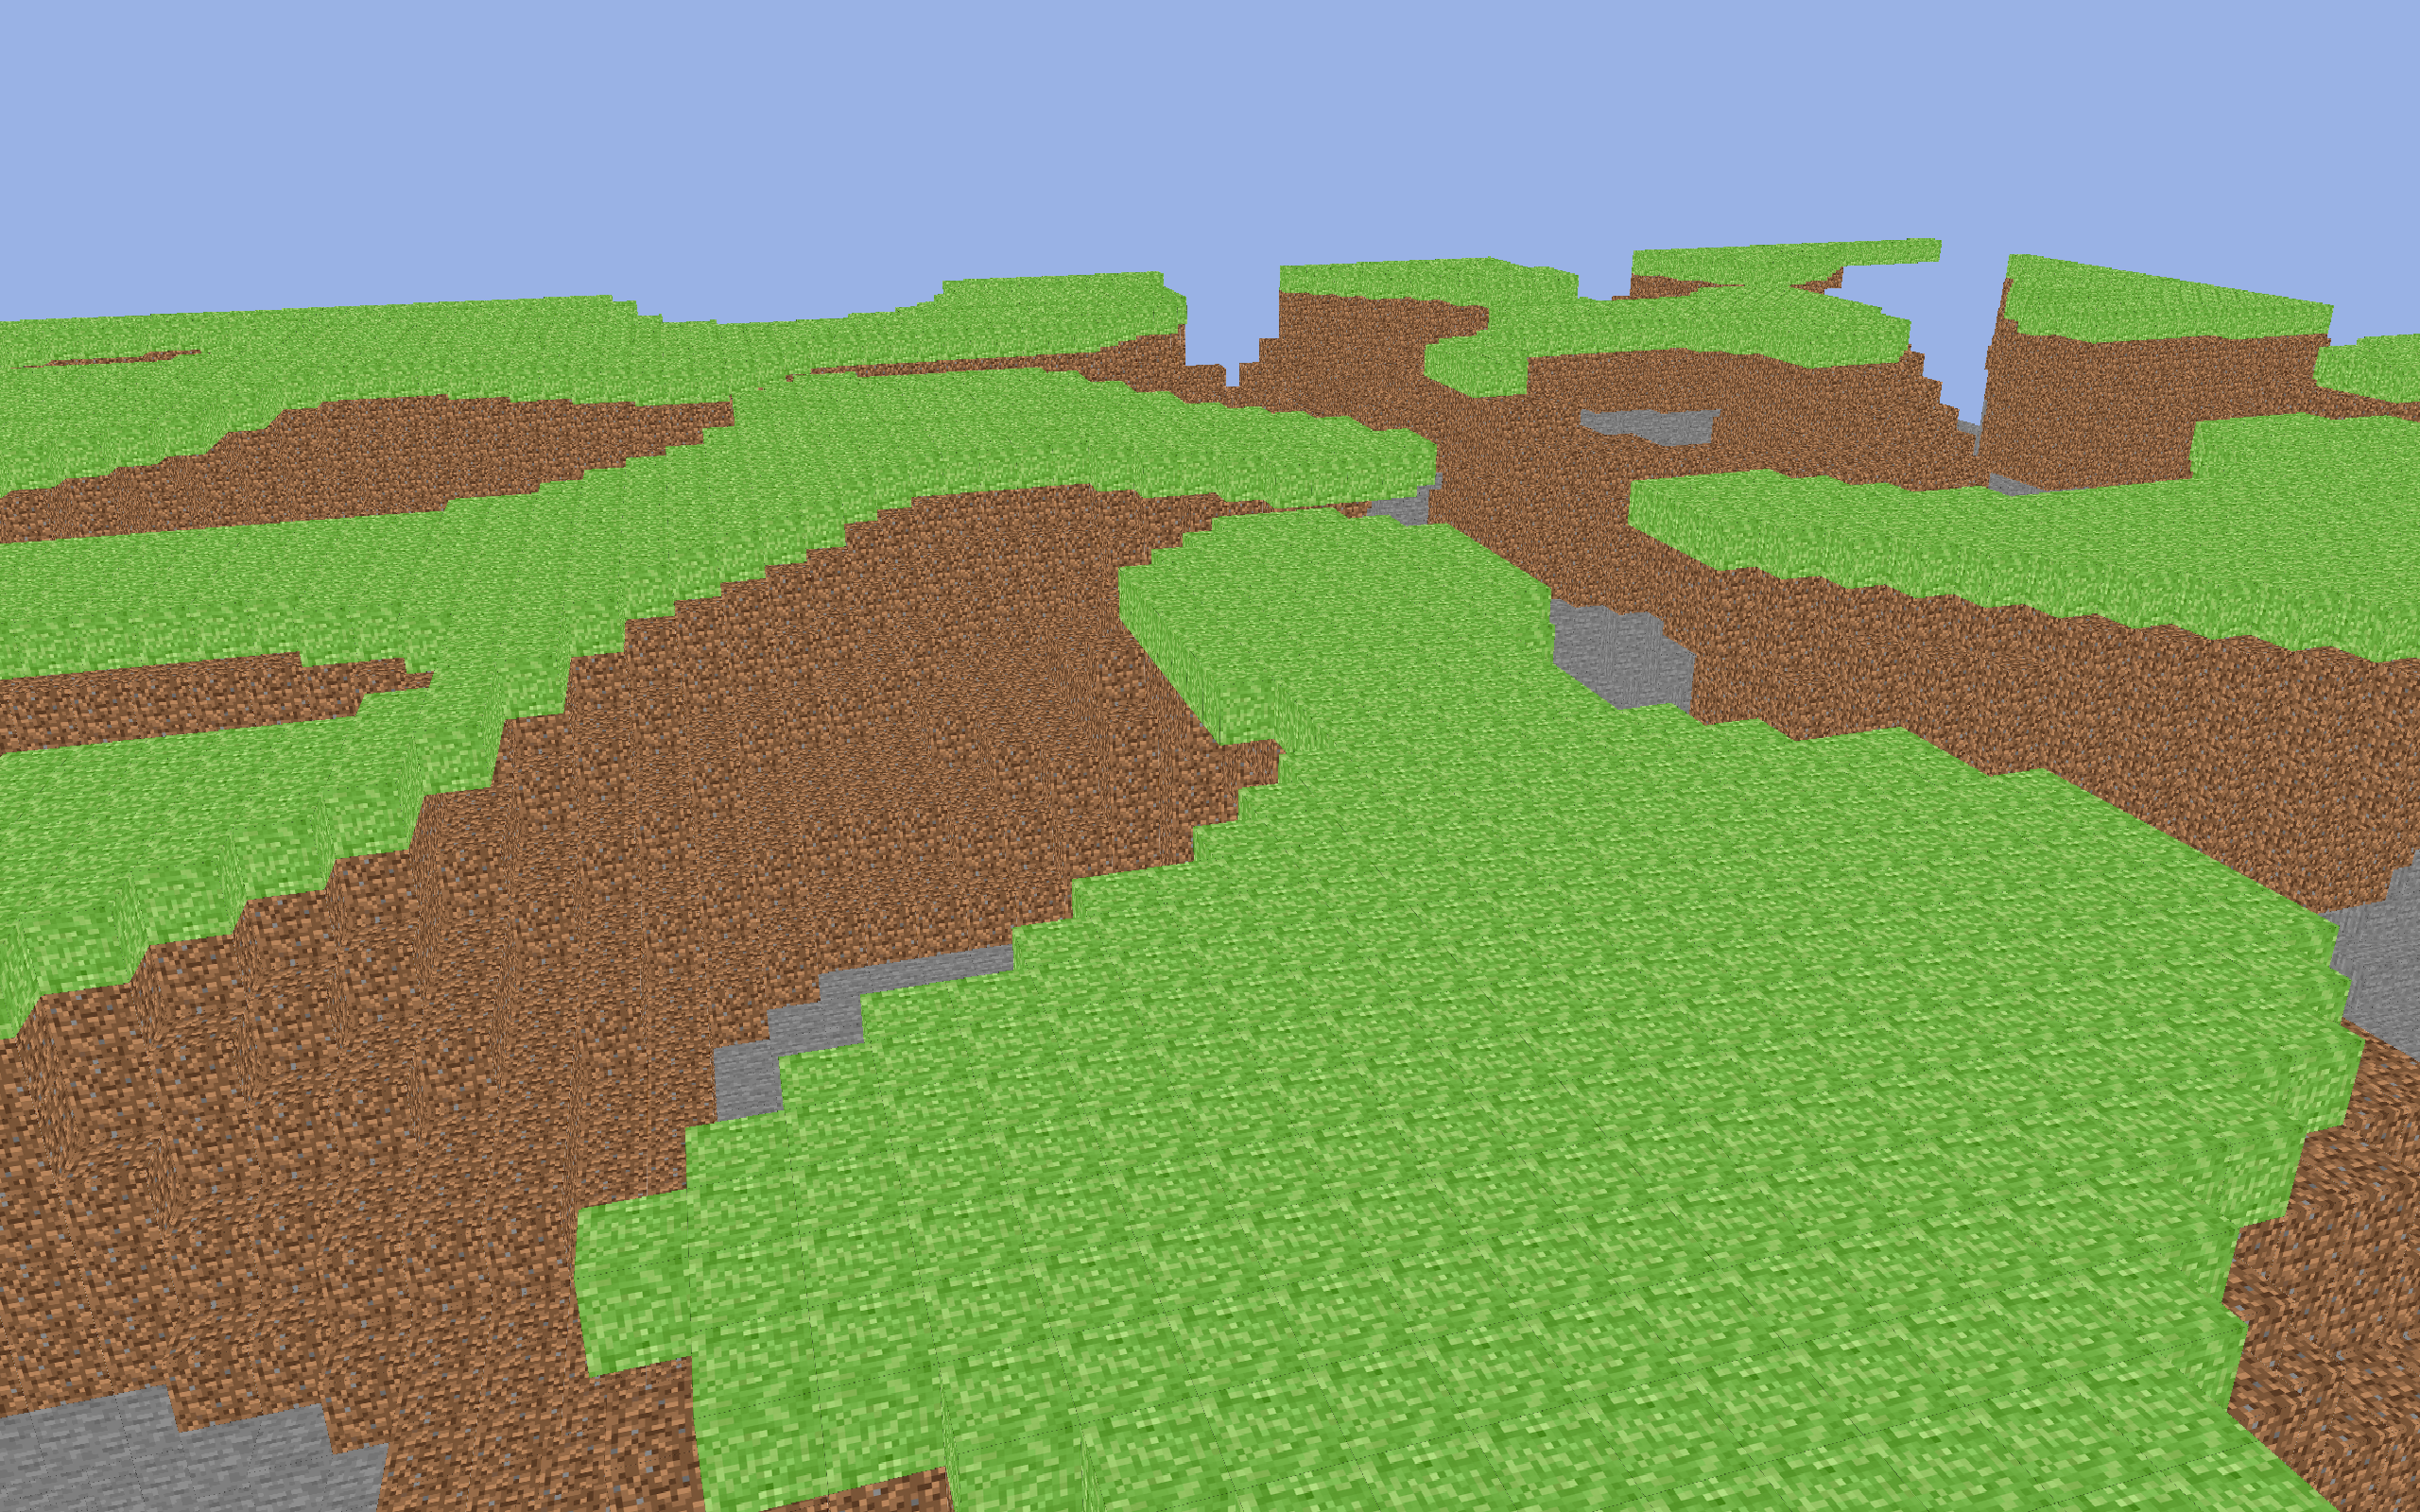
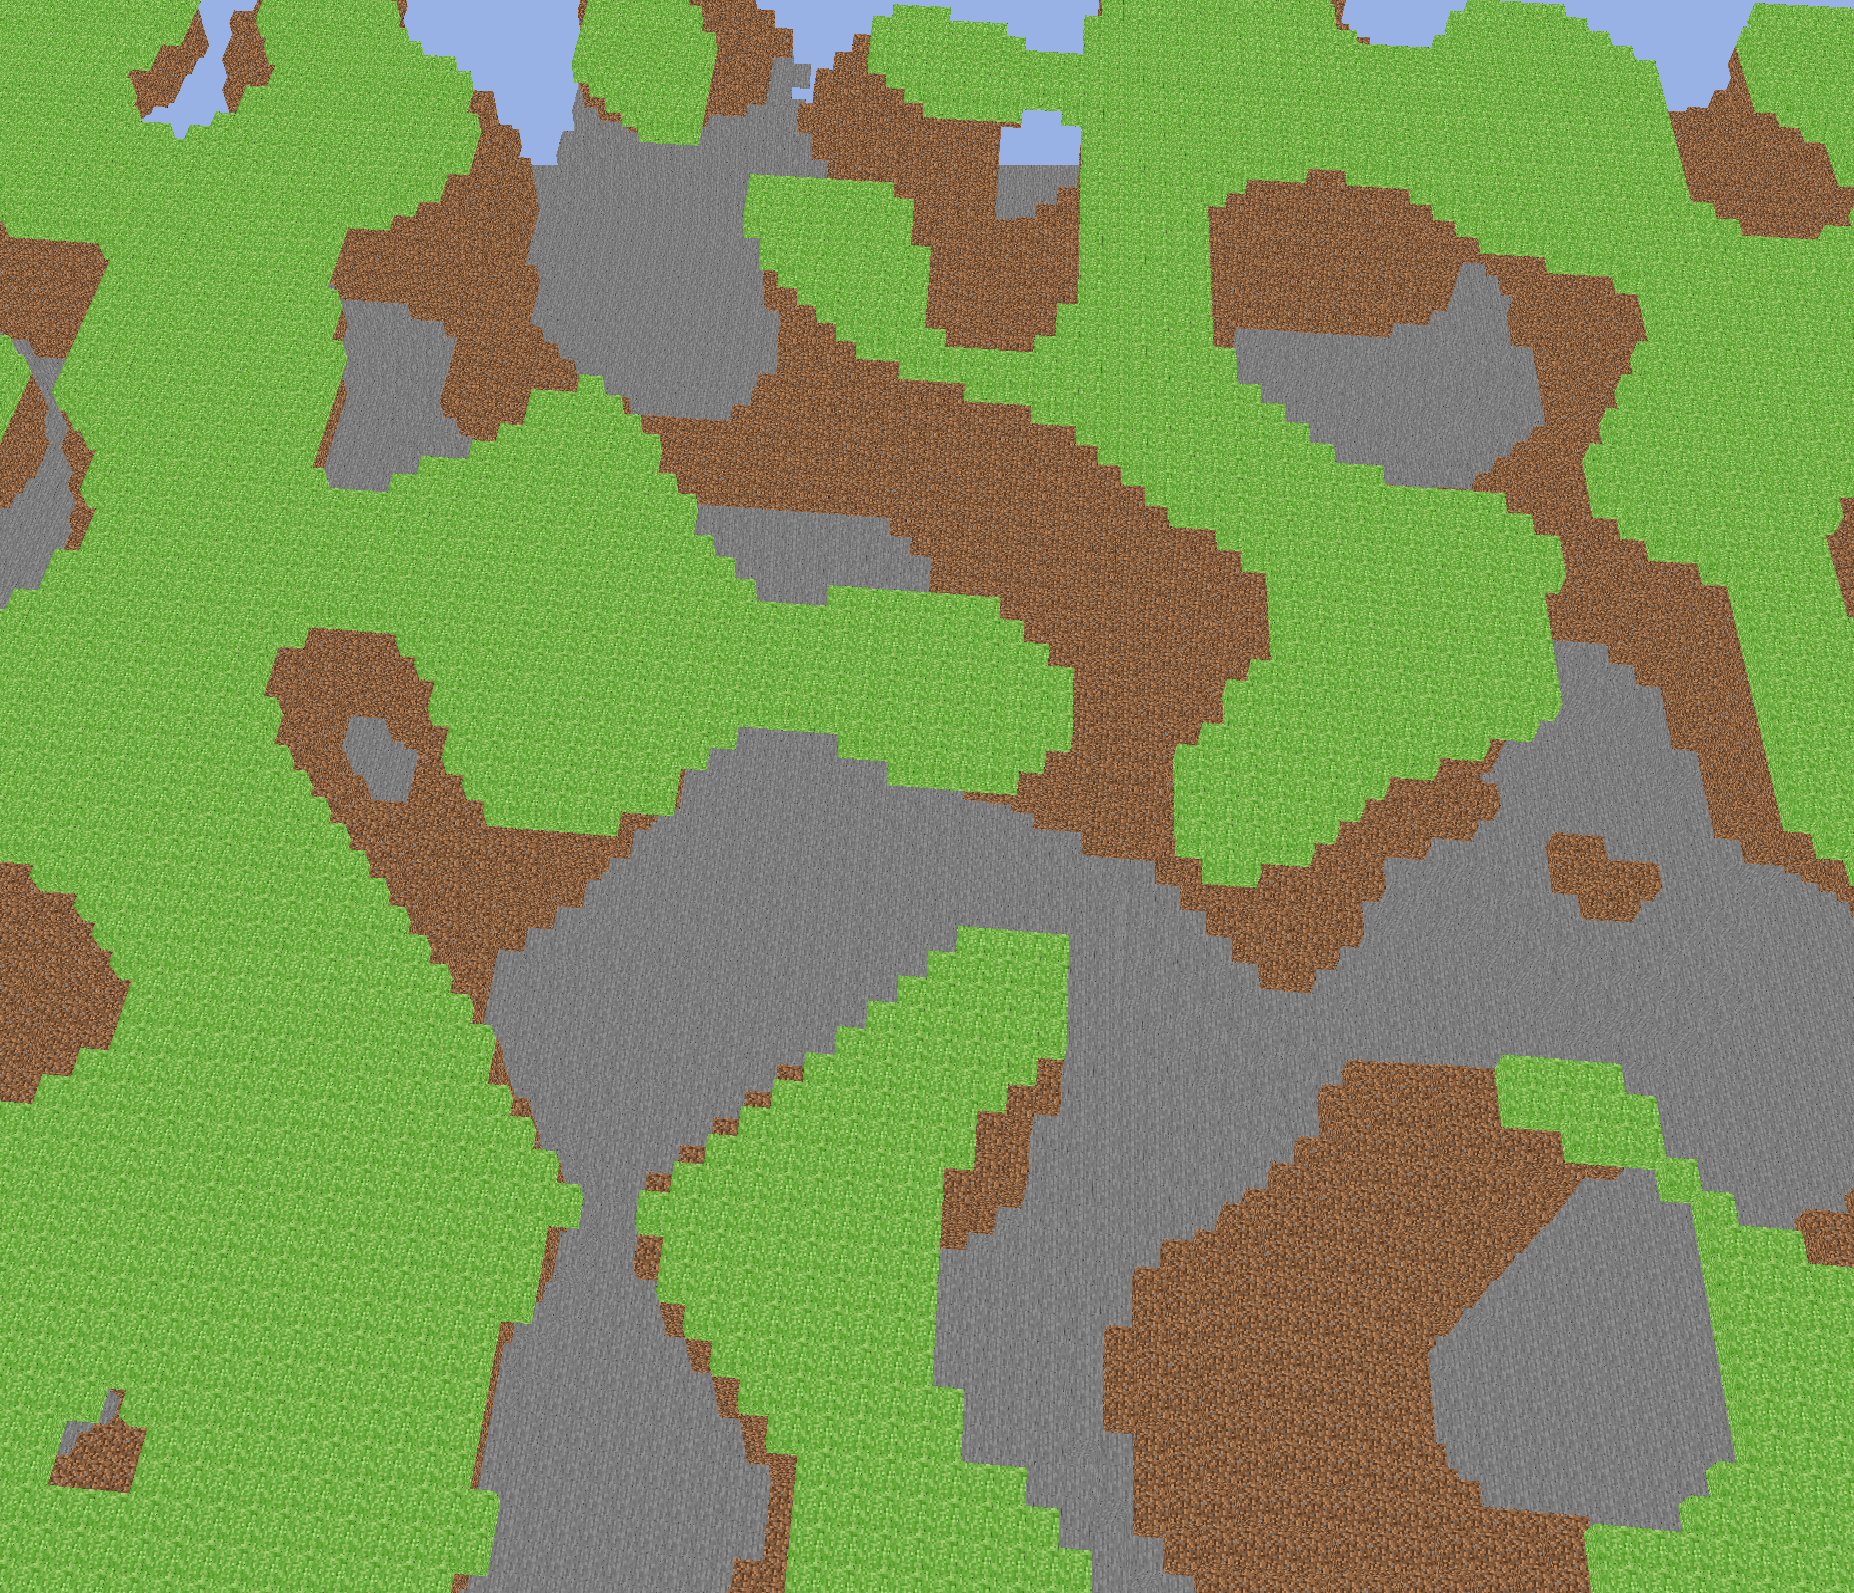
To wrap up, I spent some time tuning my noise generation and layering different granularity to achieve terrain that looked a bit more interesting. The rolling curves were ok, but I wanted better. I also added a guaranteed "floor" of stone at level 0 of the world so that it looked more like solid ground, and less like floating islands. Here are some photos from models generated after that tuning:
Project Reflection
Even though there is definitely room for improvement in some areas, I am extremely proud of this project. I'm really glad that I chose to learn the whole rendering
pipeline process, and that I can easily follow through the stages in my code.
In terms of what I would do differently, one thought prevailed the entire time I worked on this: I should have learned Rust and OpenGL separately before attempting a project that used both.
Since OpenGL is primarily a C library, the absence of a wrapper or an abstraction layer posed challenges when integrating it with Rust, and ensuring
safety became less straightforward. In retrospect, I see that attempting to learn both simultaneously made the learning process more challenging
than necessary.